AMarkets Broker Registration and Trading Tutorial


Entering the forex market isn't just about choosing a suitable broker; registering correctly and without errors also matters a great deal. Many traders, especially Iranian users, run into uncertainties at this very stage, such as choosing the account type, entering personal information, confirming their email or verifying their identity. On the other hand, even the smallest mistake in the account opening process can delay account activation or cause problems in later steps.
In this tutorial, we walk you through the AMarkets registration process step by step, based on the latest version of the broker's website. Alongside the registration tutorial, we also answer Iranian users' most important question about restrictions on using AMarkets' services, so that you have a clear picture of this broker's conditions before opening an account.
Does AMarkets Have Any Restrictions for Iranian Users?
Amarkets is one of the few international brokers that has kept its services available to Persian-speaking users in recent years. In addition to launching a Persian website and Persian support, this broker also allows Iranian users to register and verify their identity, and in its official guide it lists documents such as the national ID card, the new birth certificate, passport and driver's license as acceptable documents for identity verification.
However, there is one important point. In the «Restricted Countries» section of Amarkets' international website, Iran is still listed among the restricted countries. For this reason, as an Iranian user, you should always register and verify your identity through Amarkets' official Persian domain and the broker's Persian support channels, and before opening an account, check the latest terms of service with support.
How to Register with AMarkets Broker
To start the registration process at AMarkets, simply follow the steps below in order:
1. Open your browser and go to amarkets.trading .
If a window asking you to confirm your location appears after you enter, click the CONFIRM button to enter the site. If you don't see such a message, no action is needed and you can continue directly.
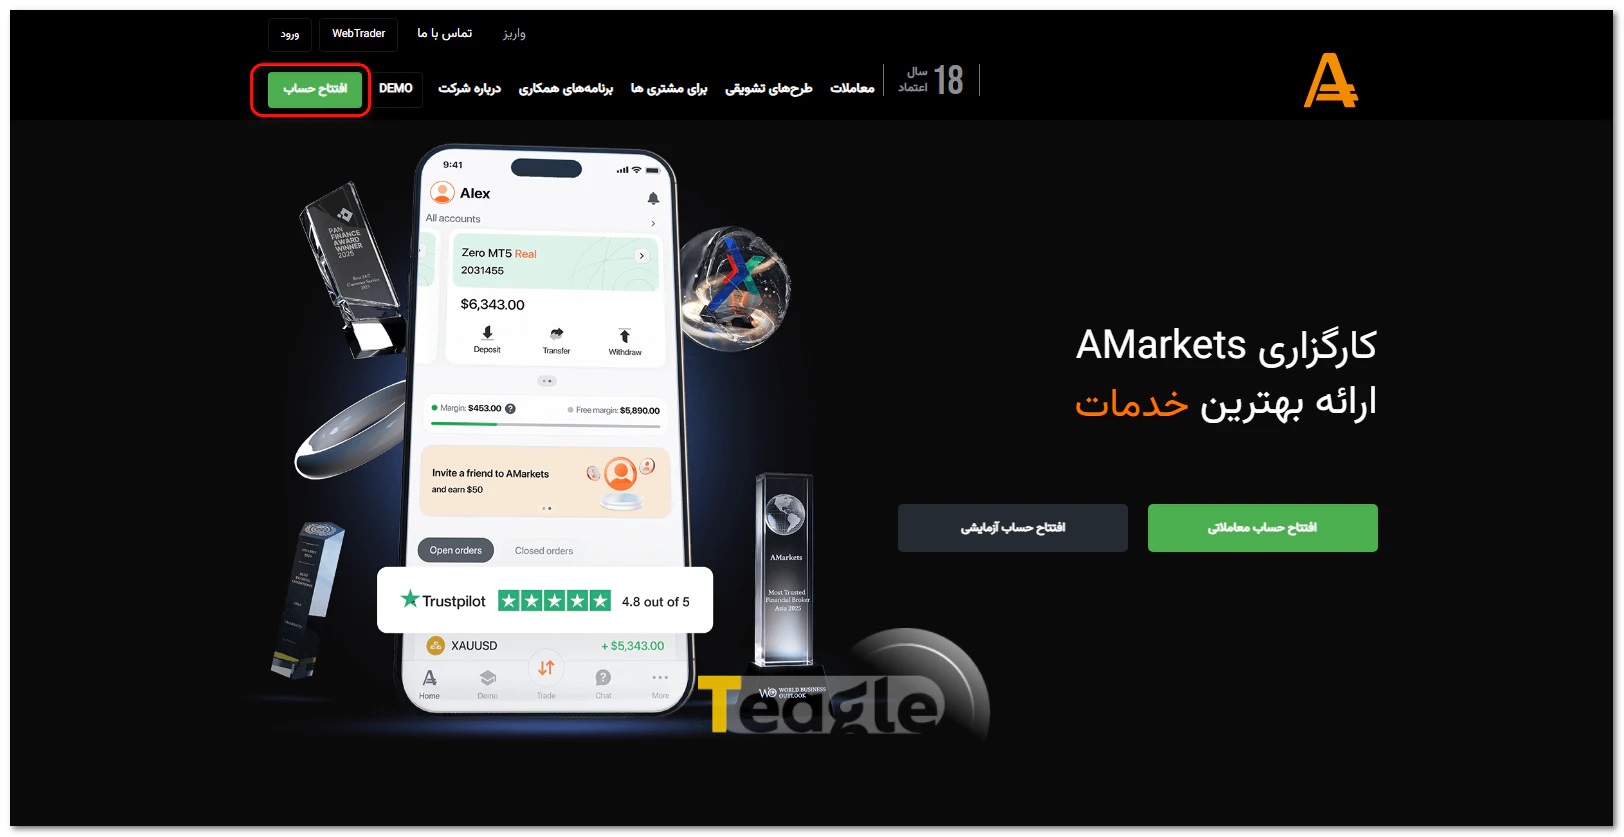
2. After confirming, the broker's homepage opens. On this page you can see the site's main menu, the «Open Account» button and the section introducing the types of trading accounts.
3. In the top bar of the site, click the green «Open Account» button.
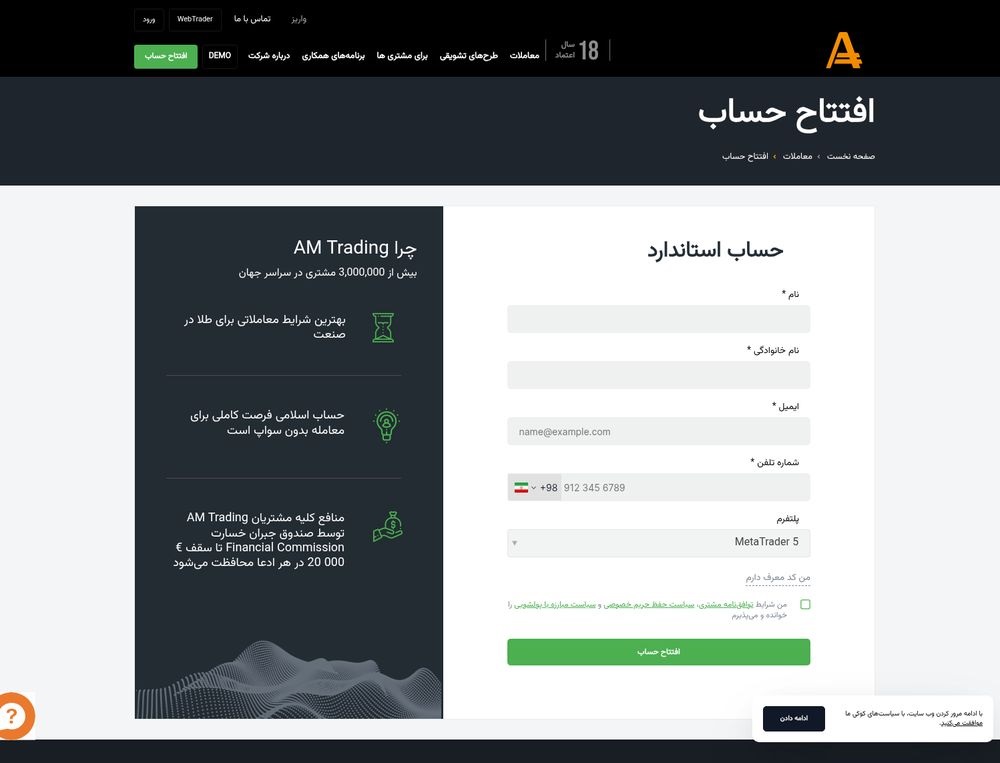
Selecting this option takes you to the account opening page. On this page, the Standard account form is on the right, and information about the advantages and features of the AMarkets broker is shown on the left.
AMarkets offers three types of trading accounts: Standard, ECN and Zero. For the rest of this tutorial, we chose the «Standard» account, as it is considered the most suitable option for getting started. Advantage of the Standard account: with a low minimum deposit, floating spreads from 1.3 pips and no commission per lot, this account is a good choice for beginner traders.
4. At this stage you need to enter your basic information in the registration form. The account opening form contains only a few main fields, and by filling them in correctly you can create your account. This information includes:
- First Name and Last Name in English (Latin) letters
- A valid email address
- Mobile phone number with country code
Next, in the trading platform section, select MetaTrader 5 (MT5) and tick the box accepting the broker's terms and conditions of service.
5. Finally, click the «Open Account» button to submit your information.
After you submit the registration form, AMarkets sends a confirmation email to the email address you entered. Until you confirm this email, the account activation process is not fully completed, so it's best to do this step immediately after registering.
6. To confirm your email, follow the steps below in order:
- Go to your email Inbox.
- Open the email sent to you by AMarkets with the subject of email address confirmation.
- Click the «Confirm Email» button or link.
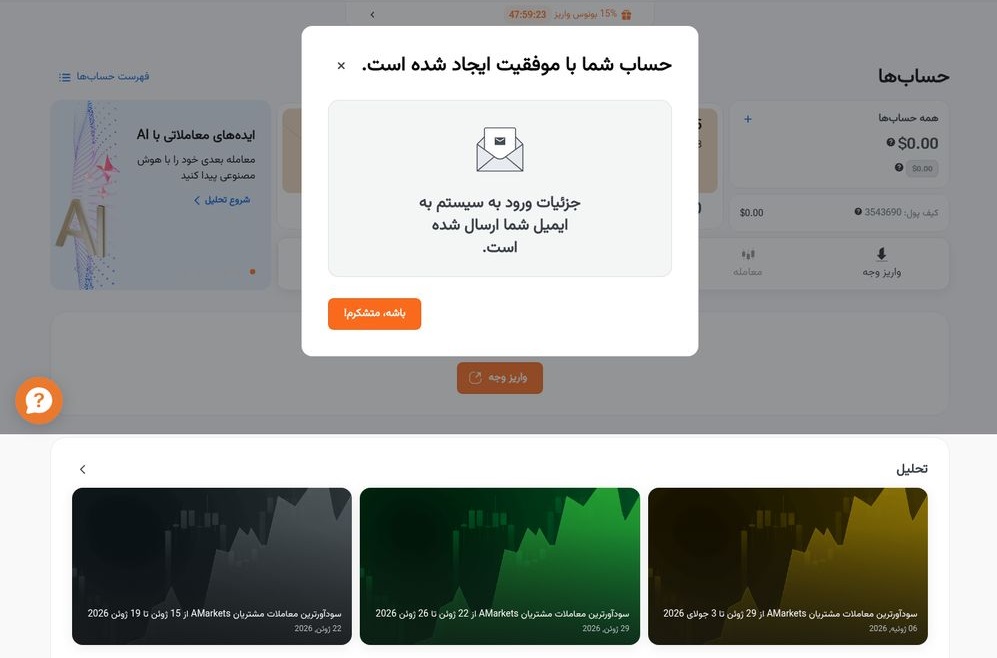
After selecting this option, your browser automatically takes you to your AMarkets account and a message confirming successful email verification is displayed.
Note: If you don't see the confirmation email in your inbox, also check the «Spam» or «Promotions» folders. If needed, you can request the confirmation email be resent from within your user panel. This procedure is also recommended in AMarkets' official guide.
Logging in to the AMarkets Personal Area
After you close the successful registration message, you are automatically taken to the AMarkets Personal Dashboard. This section is your account management center, and from this page you can carry out all activities related to your trading account, including fund management, opening new accounts and security settings.
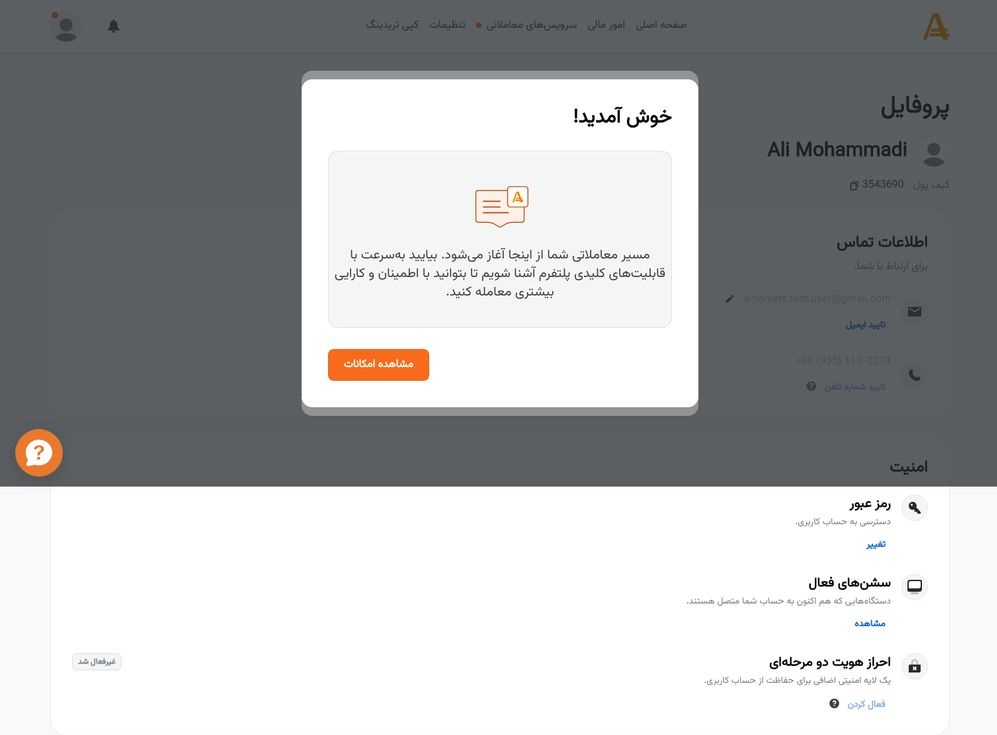
Keep in mind that to fully activate your account, you need to verify your email and phone number. This is done from the «Profile» menu by clicking «Verify Email» or «Verify Phone Number».
Email verification: Click «Verify Email». AMarkets sends a verification link to your email. Click the link to verify your email. If you don't see the email in your Inbox, also check the Spam/Junk folder.
Phone number verification: Click «Verify Phone Number». A 4- to 6-digit code is sent by SMS. Enter the code in the corresponding box and click confirm.
Once both are verified, a green tick appears next to your email and phone in your profile.
Terms and Rules for Opening Different Account Types at AMarkets Broker
To open an account and register with AMarkets, the applicant must be at least 18 years old and legally eligible to open an account. Registration is done through the Personal Area, and the user must enter their identity information and personal details accurately and correctly and, before creating the account, accept the Client Agreement, the Risk Disclosure Statement and the broker's other trading rules.
Each user may create only one user profile, but can open up to 10 active trading accounts of different types within that profile. The first deposit must also be made in US dollars (USD), and the name of the trading account holder must fully match the name of the holder of the bank account or payment method used.
AMarkets reserves the right to restrict a user's access or block their account if false or incomplete information is provided. In addition, accounts that remain with no balance and no activity for 60 days are automatically archived, and the demo account is intended solely for learning and practice; commercial use of it is not permitted.
Deposit and Funding Terms for AMarkets Broker Accounts
After opening an account and completing identity verification (KYC), you can fund your trading account through various payment methods. According to AMarkets' official documentation, all deposits are fee-free (0%), and depending on the chosen payment method, the deposited amount is usually credited to the trading account instantly or as quickly as possible. The full list of deposit and withdrawal methods available for the user's country of residence is shown after logging in to the personal cabinet.
For international users, AMarkets supports methods such as:
- Bank Transfer,
- Visa and Mastercard credit and debit cards
- and e-wallets such as Skrill, NETELLER and WebMoney
However, in addition to these methods, Iranian users can fund their accounts through Rial deposits via partner exchangers (Exchangers), Tether (USDT) transfers, and TopChange.
Among these options, depositing Tether via the TRC-20, ERC-20 and BEP-20 networks is considered the fastest method, and in most cases the account balance will be credited within less than 30 minutes.
The minimum amount required to open an account also depends on the trading account type: the minimum initial deposit is $100 for Standard and Fixed accounts and $200 for the ECN account. However, this limit applies only to the first deposit, and once the account is activated, subsequent deposits have no specific minimum amount.
To fund your account:
- Log in to your account by entering your email and password.
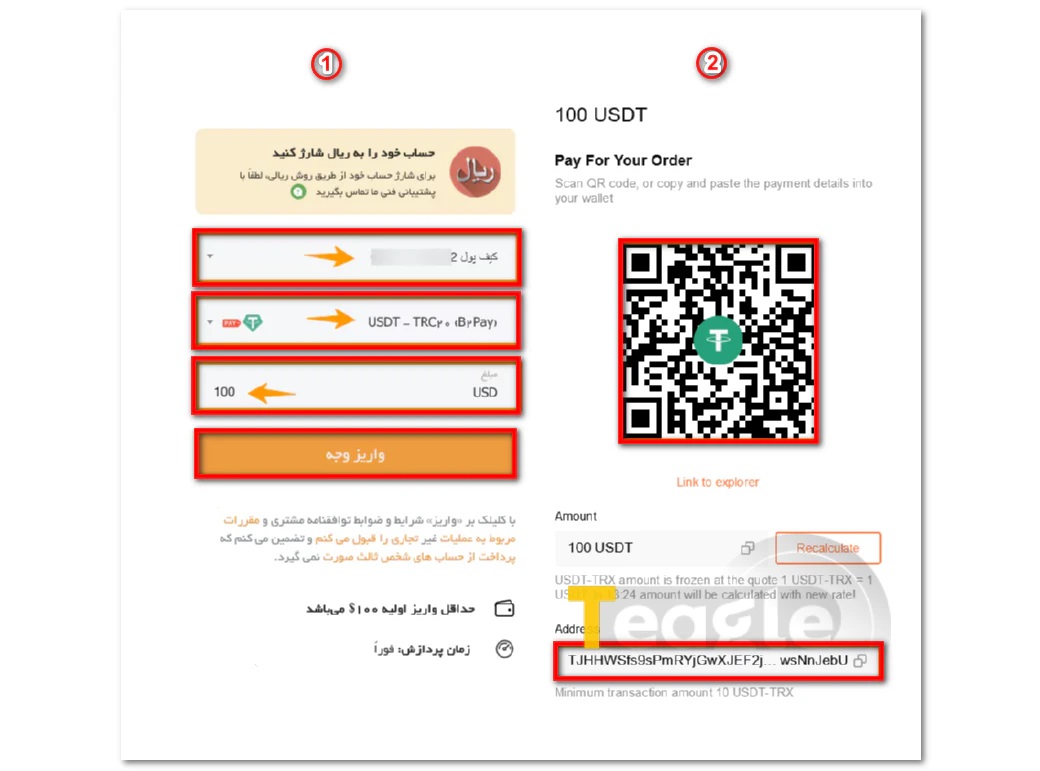
- After logging in to the AMarkets cabinet, go to the Finance section and then the «Deposit» subsection. This section displays a list of all payment methods available for your region.
For example, by selecting crypto payment, the relevant blockchain network and the amount, the deposit address will be shown to you. By scanning the QR code or copying the address, you can use it to deposit Tether or other supported cryptocurrencies.
How to Download and Install AMarkets Broker Trading Platforms
AMarkets supports two main platforms, MetaTrader 4 (MT4) and MetaTrader 5 (MT5), plus its own AMarkets app. Both MetaTrader platforms are available on Windows, macOS, iOS and Android.
AMarkets also has its own mobile app, available on the App Store, Google Play and Galaxy Store. Besides trading, the app gives easy access to the client cabinet, deposits, withdrawals and market analysis.
- Download the mt4setup.exe or mt5setup.exe file from the AMarkets website.
- Double-click the file to start the installation.
- Click «Next» and confirm the installation path.
- Wait for the installation to finish.
Launch the program. On first launch, the «Open an Account» window appears.
Connecting AMarkets to MetaTrader 4 and MetaTrader 5
After installing MetaTrader, you need to connect it to the AMarkets server and log in with your account credentials.
After registering with AMarkets, you will receive an email containing the following information:
- Login (account number): a multi-digit number,
- Password: the password generated by AMarkets (you can change it later in the client cabinet)
- Server: AMarkets-Real for a live account or AMarkets-Demo for a demo account
To connect in the desktop version of MetaTrader, follow these steps:
- Launch MetaTrader. In the «File» menu, click «Open an Account» (or, if you have already added an account, use File > Login).
- In the search box, type AMarkets and click the «Scan» button. A list of AMarkets servers will appear.
- Select the server you want and click «Next».
- Enter your account number (Login) and password.
- If you want the password to be saved, tick «Save password»
- Click «Finish» or «Login».
If the details are correct, a green bar and your account name in the form «AMarkets-Real: login number» will appear in the bottom-right corner of MetaTrader.
How to Withdraw from an AMarkets Broker Account
Withdrawing funds from AMarkets takes a few simple steps; however, following the rules on payment methods and the destination account details is very important. In general, to submit a withdrawal request you need to log in to your personal cabinet, select the trading account and withdrawal method, enter the amount and destination details, and confirm the request.
Withdrawal steps
- Log in to the AMarkets personal cabinet: Log in to your user panel using your account credentials.
- Go to the Finance section: From the main menu, select «Finance» (Finance) and then «New Withdrawal» (Withdrawal) .
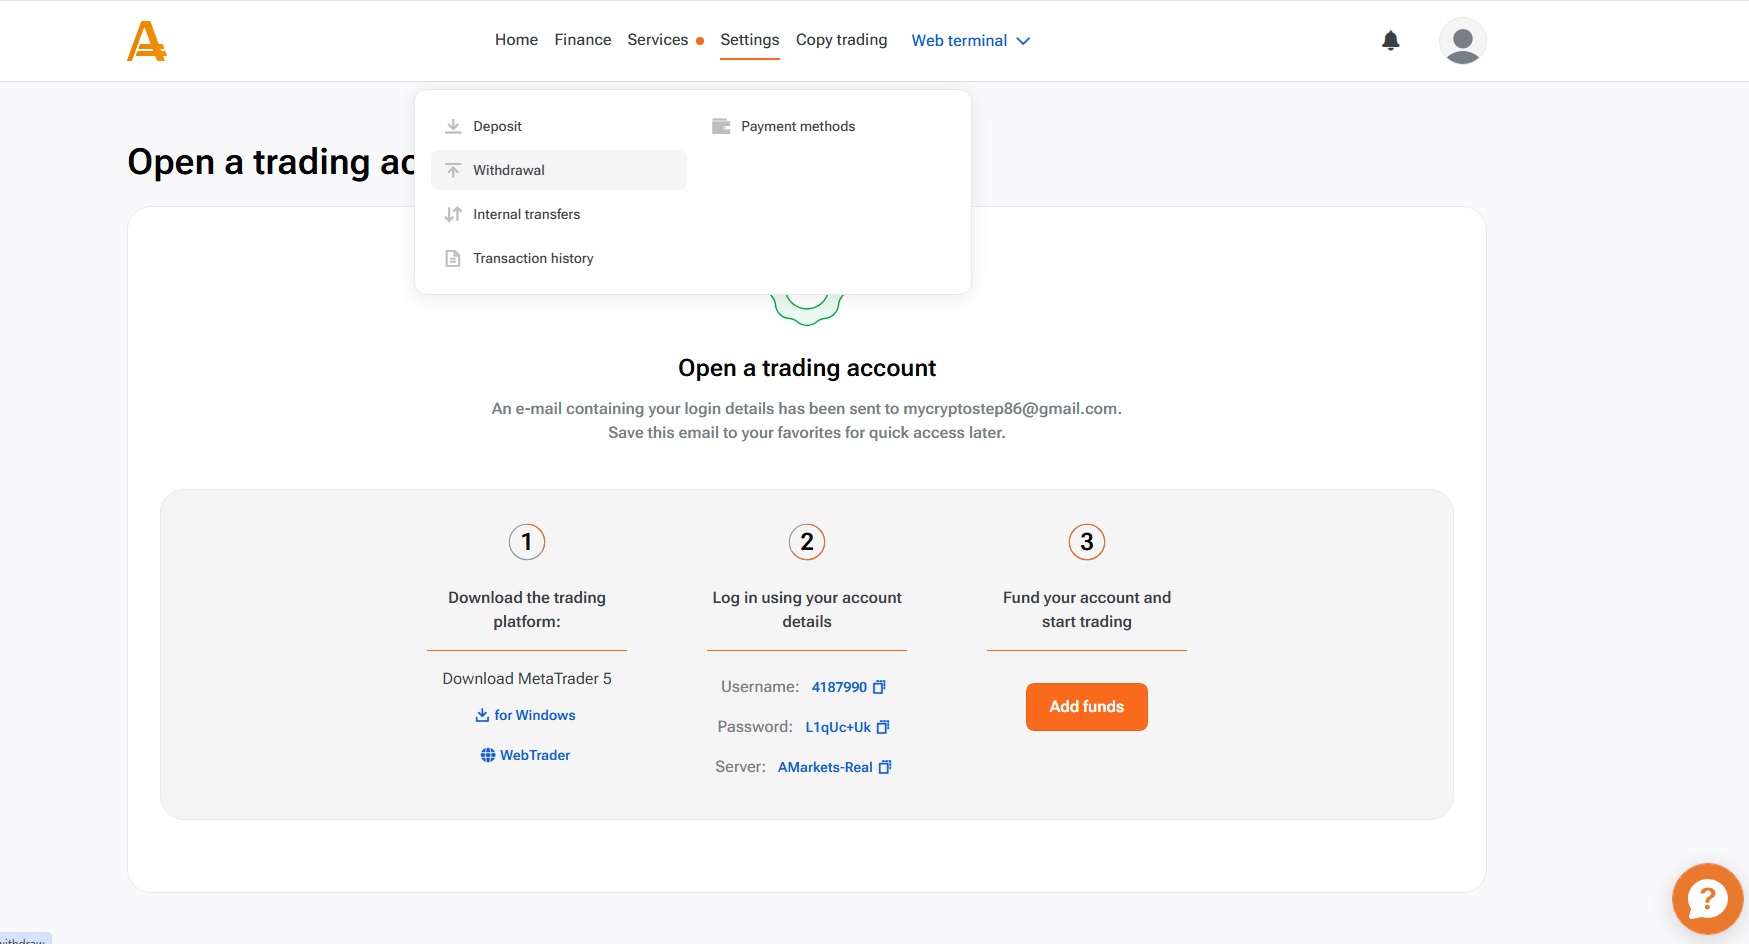
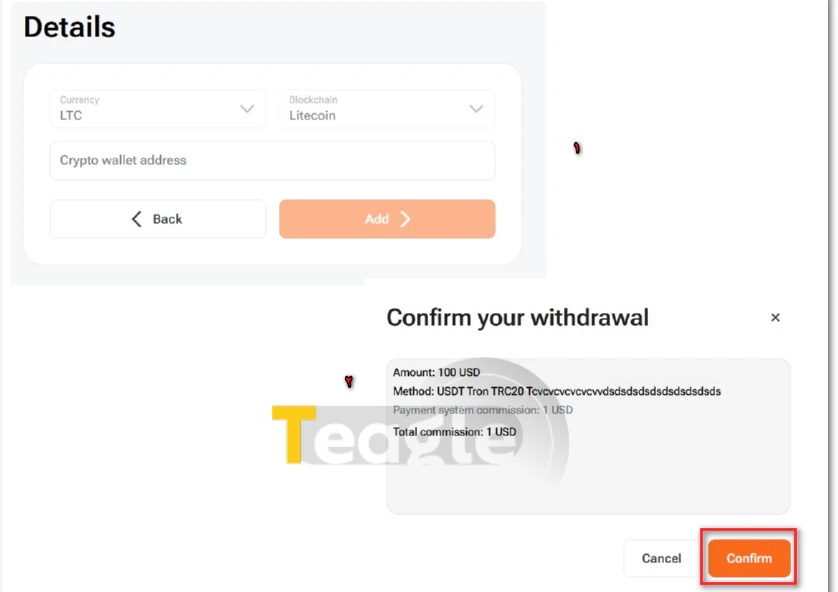
- Select the account and withdrawal method: Select the trading account you want, then one of the available withdrawal methods (such as Topchange or cryptocurrency). For example, to withdraw via crypto, after selecting the «Cryptocurrency» option, specify the cryptocurrency and network you want and enter the destination address.
- Enter the amount and destination details: Enter the withdrawal amount and carefully fill in the destination details, such as the wallet address or exchange information.
- Confirm the request: In the final step, confirm the request through the confirmation window or a security code so that processing can begin.
Important AMarkets Withdrawal Rules
Before submitting a request, keep a few basic rules in mind; following them can prevent your withdrawal request from being delayed or rejected:
- Matching deposit and withdrawal methods: Withdrawals usually have to be made using the same method you used to deposit funds.
- Completing identity verification: Registration and identity verification must be completed before you request a withdrawal.
- Matching account holder name: The destination account or wallet details must belong to the trading account holder; withdrawals to third-party accounts are not allowed.
- Paying attention to free margin: The withdrawable amount cannot exceed Free Margin or the account's free margin.
Articles related to the broker
User reviews

Newest
