How to Register and Start Trading with LiteFinance Broker



Getting familiar with how to sign up and log in to the LiteFinance broker is the first step to start trading with this broker. If you plan to open a trading account with LiteFinance, or log in to your user panel for the first time, knowing the registration and login steps can help you avoid common mistakes and speed up your entry into the real market. In this article, we walk through the process of creating an account, verifying your information and logging in to your personal LiteFinance dashboard step by step, with screenshots.
LiteFinance Broker Access Conditions for Iranians
LiteFinance broker still provides services to Iranians, and there is no need to change your IP or use a VPN to access its services. However, access to its main website may sometimes be restricted or disrupted for various reasons. For this reason, some professional traders use a VPS and a static IP to log in to the website or their personal cabinet.
Normally, no special server or settings are needed for trading, and after logging in to your account, the connection to the MetaTrader or cTrader trading servers is established automatically. To visit this broker's main website, you can use this link .
How to Register with LiteFinance Broker?
To find out how to register with the LiteFinance broker, go to the broker's website and follow the steps below:
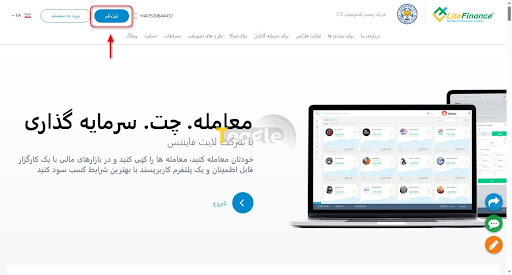
1. In the top corner of the homepage, click «Sign Up».
2. In the next step, you will be asked for information including your date of birth and email. After entering your email and creating a password, a verification code is sent to the email you entered. After entering the code, click «Verify», and you will be taken to a page asking for your phone number. You can skip this by clicking «Skip», but we recommend entering your number at this stage, since you will be asked to provide a phone number in later steps anyway.
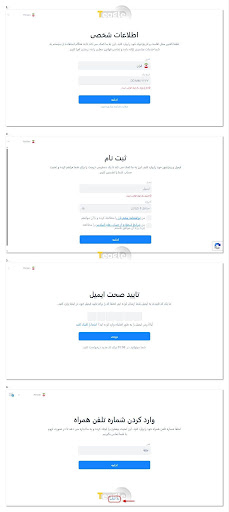
3. Finally, your account is created and you enter your personal dashboard.
How to verify your identity with the LiteFinance broker
After registering and logging in to your account panel, follow the steps below to verify your identity:
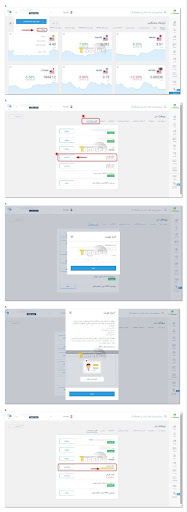
1. In your account panel, click on your email in the top corner and select «My Profile».
2. On the page that opens, click «Verification», then click «Verify» in the «Identity Verification» row.
3. In the window that opens, enter your first and last name in English, along with your gender and date of birth, and click «Continue».
4. In the next section, you need to upload a color copy of one of your identity documents (passport, both sides of your national ID card, or driver's license).
5. Finally, your identity verification goes under review, and once approved, the verification is complete.
In the next step, you also need to submit your address. To do this, follow the steps below:
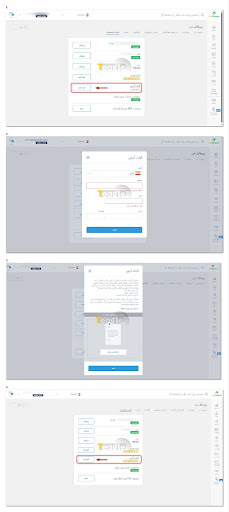
1. In the «My Profile» section, click «Verification», then click «Verify» in the «Proof of Address» row.
2. In the window that opens, enter your province, city, address and postal code in English and click «Continue».
3. In the next step, you need to upload a proof of residence document (a utility bill, a bank or credit card statement, a tax invoice, or an official certificate issued with the name and address of an internationally recognized organization) and click «Continue».
4. Finally, the «Proof of Address» status moves to the document review stage.
Activating Accounts at LiteFinance Broker
To activate your LiteFinance broker account, follow the steps below.
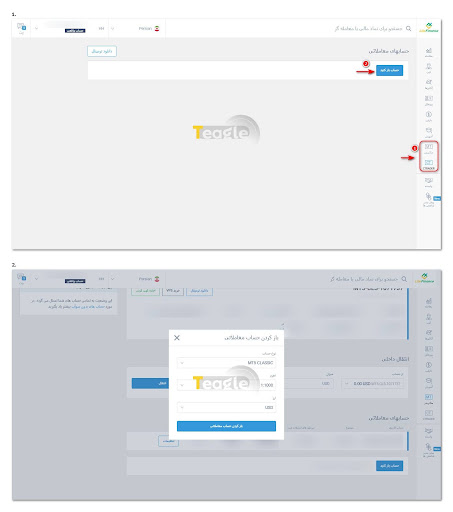
1. In the right-hand drop-down menu, click on the platform you want (MetaTrader or cTrader), and on the page that opens, click the «Open account» option.
2. In the window that opens, select the account type and leverage you want and click «Open trading account».
3. Your account is created, and an email from LiteFinance containing your account details is sent to your email address.
How to Connect LiteFinance to MetaTrader
One of the positive features of the LiteFinance broker is the ability to connect to the MetaTrader 4, MetaTrader 5 and cTrader platforms. At LiteFinance, to download MetaTrader and cTrader, click the «Forex Trading» option on the website's home page, then choose and download whichever platform you want for your system: Windows, MacBook, iPhone or Android.
To learn how to connect your account to MetaTrader, see this article , and for a tutorial on connecting your account to cTrader, see this article .
How to Fund Your Account and Deposit at LiteFinance Broker
To fund and deposit into your account, follow these steps:
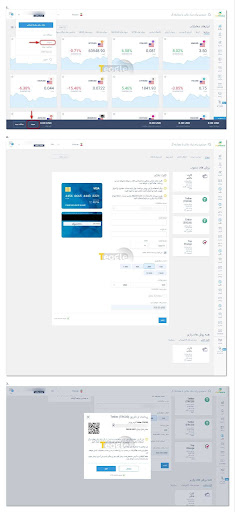
1. Find the «Deposit» option in your user panel and click on it.
2. On the page that opens, the deposit methods are displayed, including bank card, cryptocurrency and TopChange, and you can choose any of the methods shown. With the bank card method, you must first select your trading account and then enter your card details along with the deposit amount. With the cryptocurrency method, after entering the payment amount, you need to scan the destination address in your wallet or exchange or copy the address, and finally deposit the amount of Tether.
3. For a Rial deposit, you must use the TopChange exchange method, which is explained below.
Rial deposit conditions at LiteFinance broker
Follow these steps:
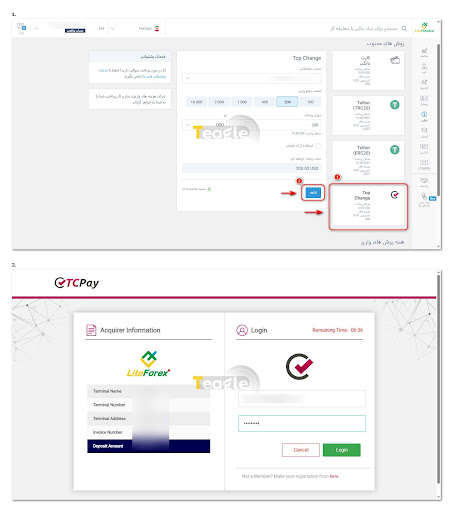
1. In the Deposit section, click on the Top Change option, select the account type and deposit amount, and click on «Continue».
2. You will be redirected to the TopChange exchange page.
3. You must have already registered and verified your identity on the TopChange exchange so that you can enter your username and password and click on Login.
3. Make your Rial deposit through the TopChange exchange. To learn how to make a Rial deposit through the TopChange exchange, see this article .
How to Withdraw from LiteFinance?
To withdraw from the LiteFinance broker, follow the steps below:
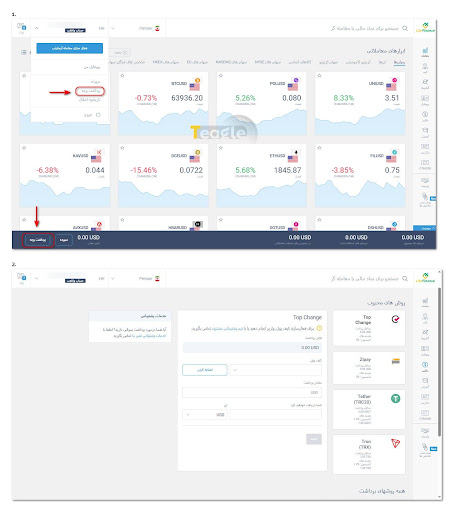
1. Log in to your user panel and click on the «Withdraw Funds» option.
2. You can withdraw from the LiteFinance broker via Topchange, ZiPay and cryptocurrency. For cryptocurrency withdrawals, you need to add your wallet address and enter the withdrawal amount. For Topchange and ZiPay, you also need to enter the wallet address of your Topchange or ZiPay exchange account.
3. Finally, the requested amount will be deposited into your wallet.
Articles related to the broker
User reviews

Newest
