How Iranian users can trade with Moneta Markets



Can you really sign up with this broker easily, verify your account and start trading?
\n\nIn this comprehensive guide we will be with you step by step and explain, in simple and clear language, all the stages of signing up with Moneta Markets, from the moment you enter the website to your first deposit and trade.
\n\nWhether you are a beginner or have been active in the financial markets for years, this tutorial is designed so that anyone can use it without confusion.
Checking whether Moneta Markets is available to Iranian users
Although Moneta Markets is an offshore-regulated broker that does not operate under strict European rules and can therefore work with users from different countries, this broker has recently announced that it no longer serves Iranians. Even so, below we go through how to sign up with Moneta Markets.
How to sign up with Moneta Markets
Signing up with Moneta Markets is really simple and takes only a few minutes:
\n\n\n\n
1. Go to the Moneta Markets website and click the Sign Up button
\n\n
\n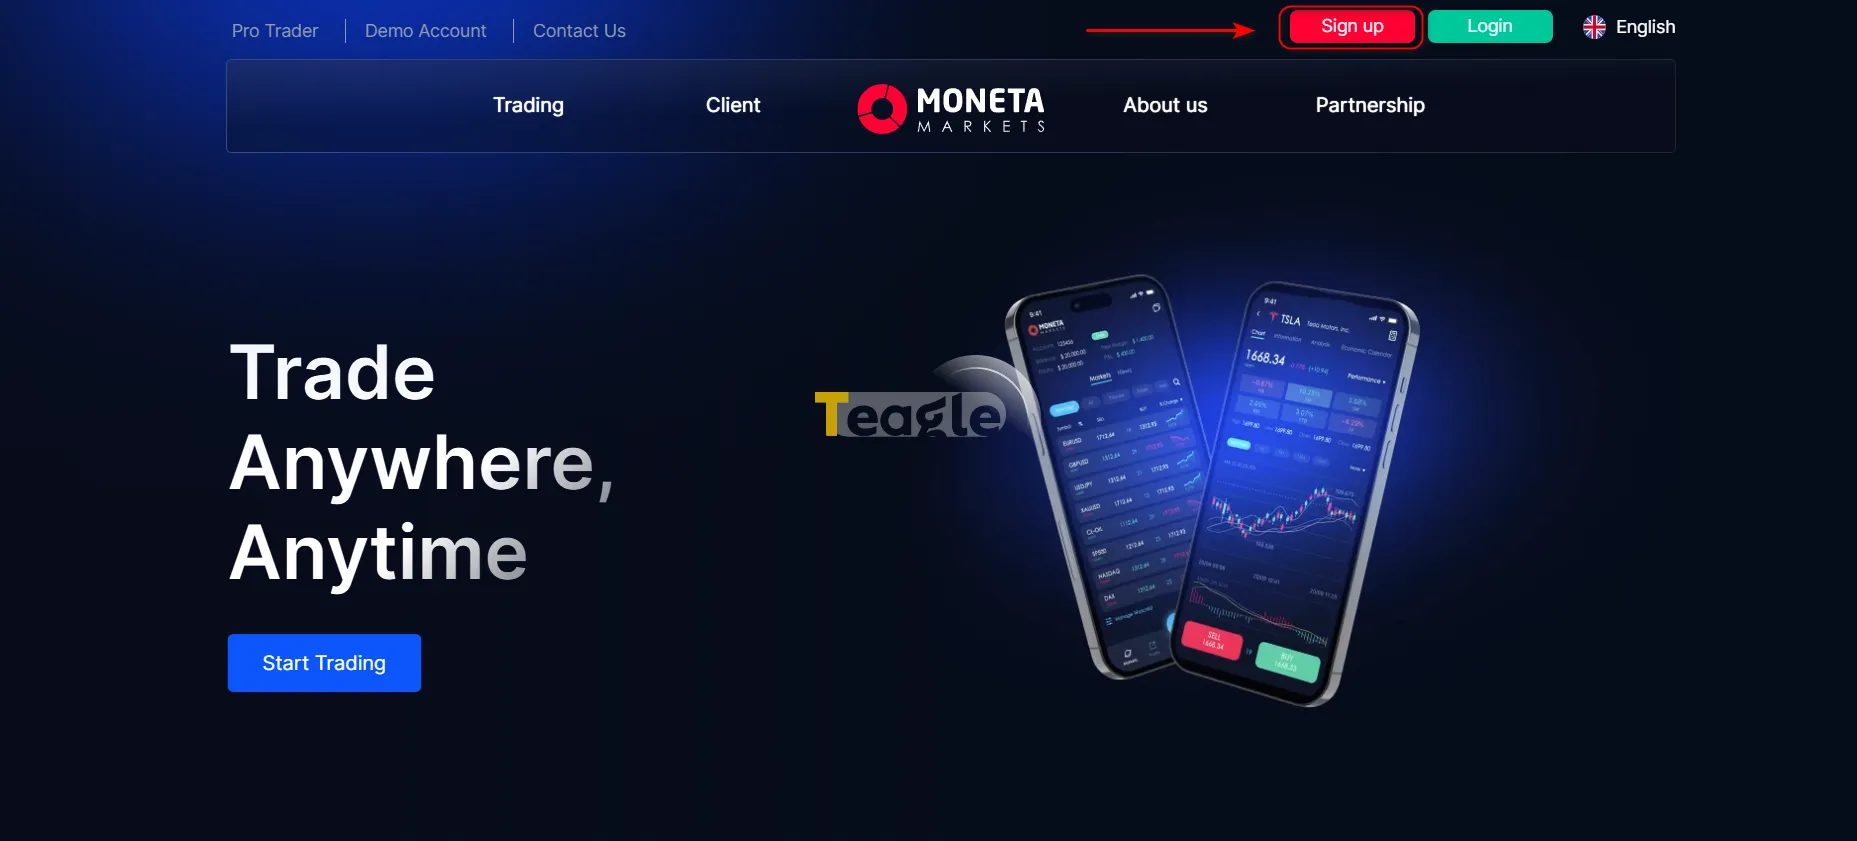
\n
2. After clicking the sign-up button, you reach the form page. This page is titled Get Started with Moneta Markets and has a few simple fields.
\n\n
\n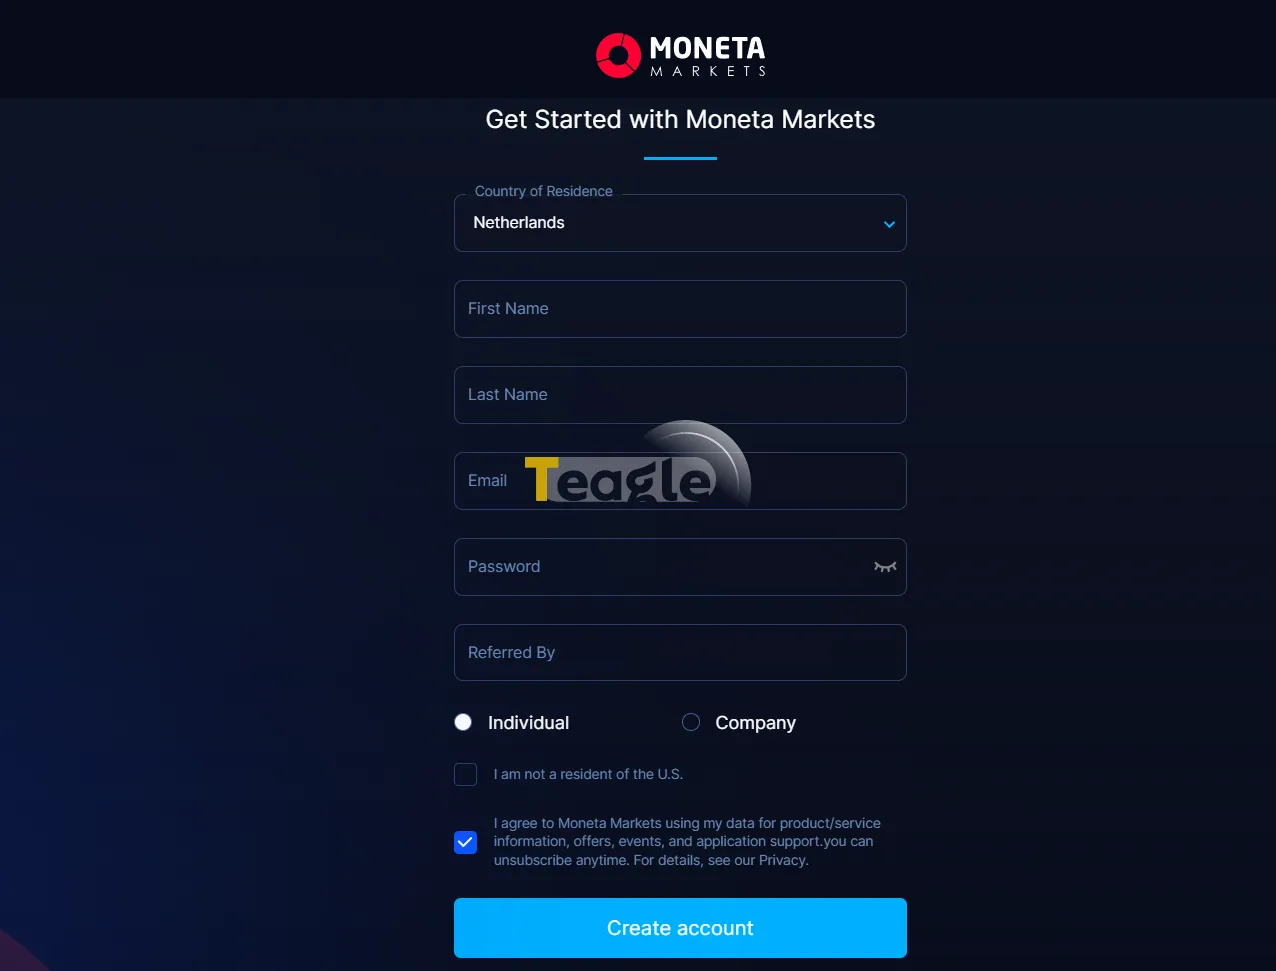
\n
At the bottom of the form there are two options, Individual and Company. If you plan to sign up as an individual, choose Individual. You also need to tick the two checkboxes below: one to confirm that you are not a US resident and the other to agree to Moneta Markets using your information. Finally, click the blue Create account button to go to the next step.
\n\n\n\n
3. As soon as you submit the form, you see a page titled Important Information. This page says that the website is operated by an entity outside the European Union and is not under the direct supervision of European regulators.
\n\n
\n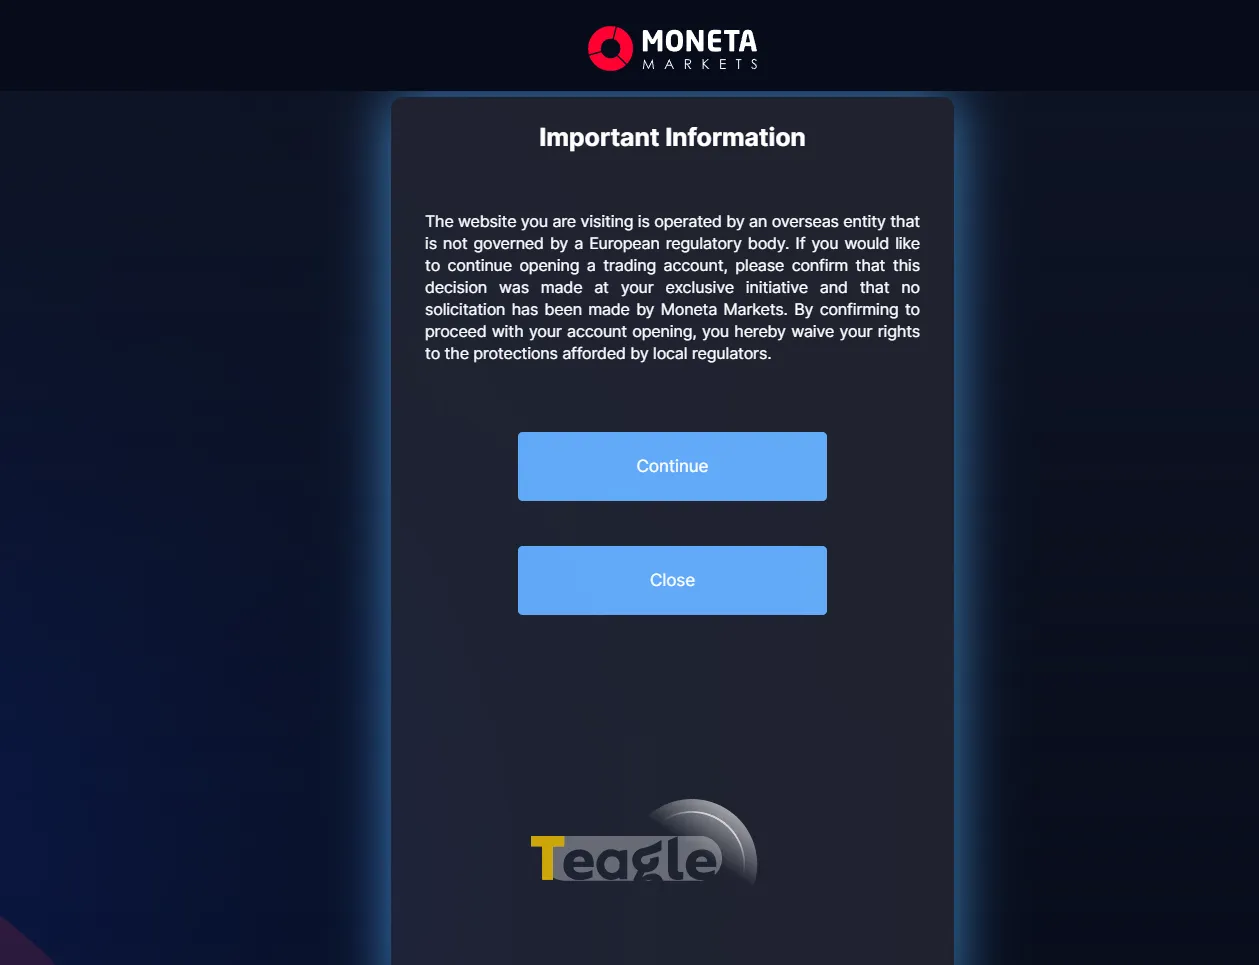
\n
In this part, the website wants to know that your decision to open an account was fully informed and voluntary and that there was no pressure or insistence from the broker. If you agree to these terms, click the blue Continue button. If you do not want to continue, click the Close button and leave the page. After confirming, you are taken to the Loading page.
\n\n\n\n
4. You enter the user panel and see a page titled Lv1. Account Opening Verification.
\n\n
\n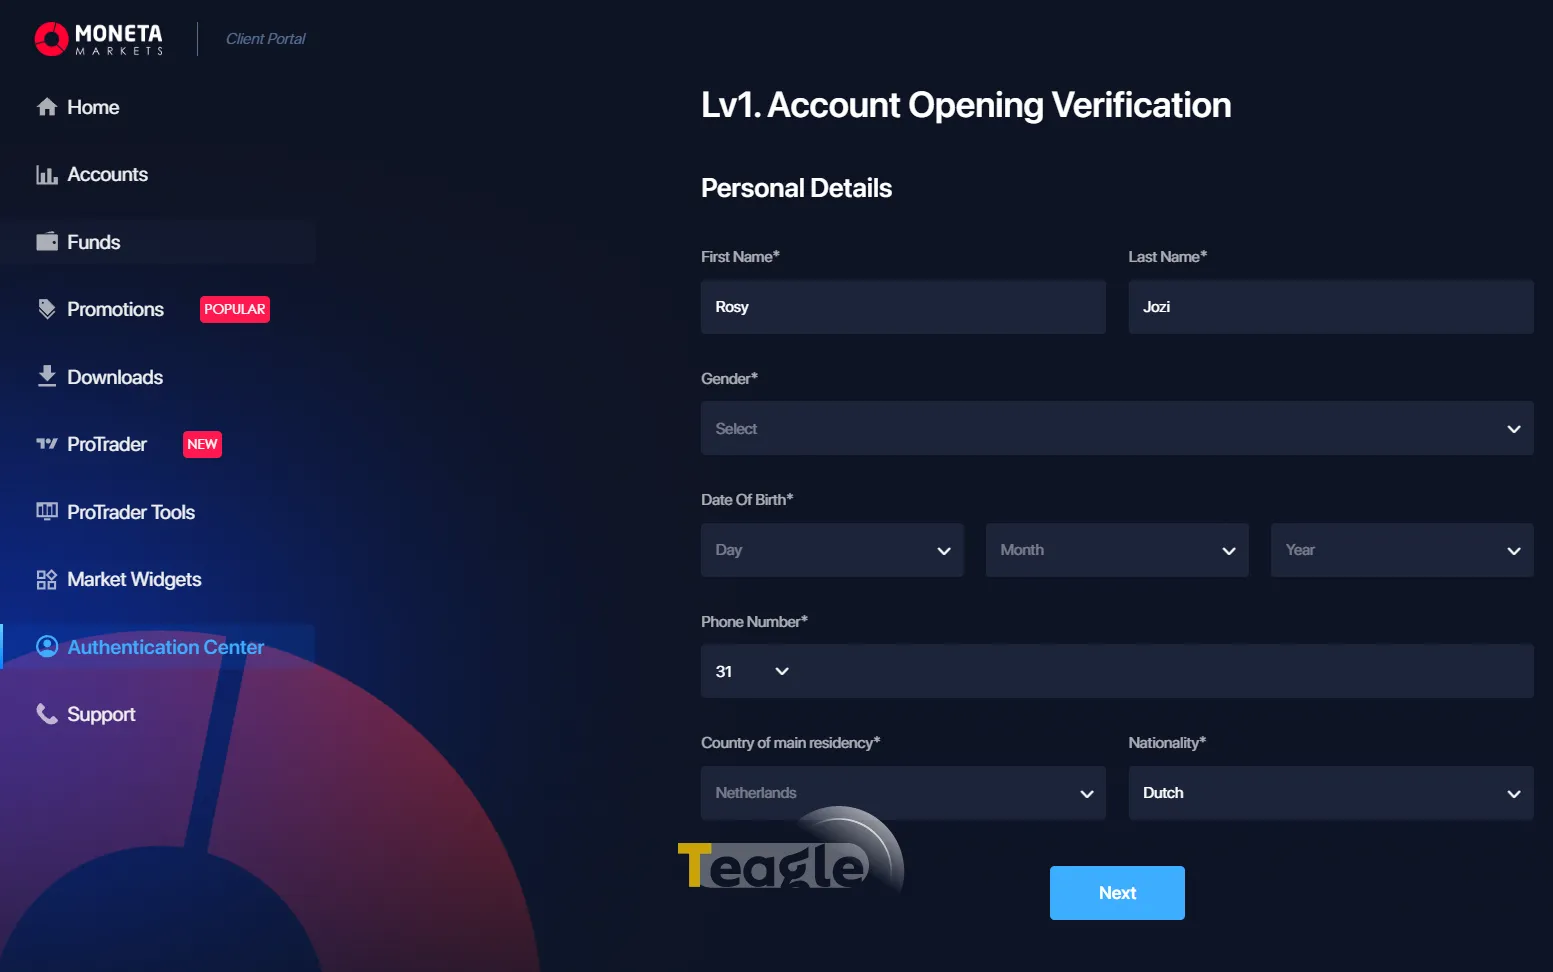
\n
Information you need to fill in:
\n\n- \n
- First Name \n
- Last Name \n
- Gender \n
- Date Of Birth \n
- Phone Number \n
- Country of main residency \n
- Nationality \n
The very important point here is that all the information you enter must match your identity documents, because in later steps you will need to upload copies of your documents, and any mismatch may delay your account's approval.
\n\nAfter filling in all the fields, click the blue Next button to go to the account settings step.
Verifying Iranian users at Moneta Markets + required documents
The verification steps at Moneta Markets are as follows.
\n\n1. Read and accept the privacy rules: as soon as you click the verification button, the Data and Privacy page appears in front of you.
\n\n
\n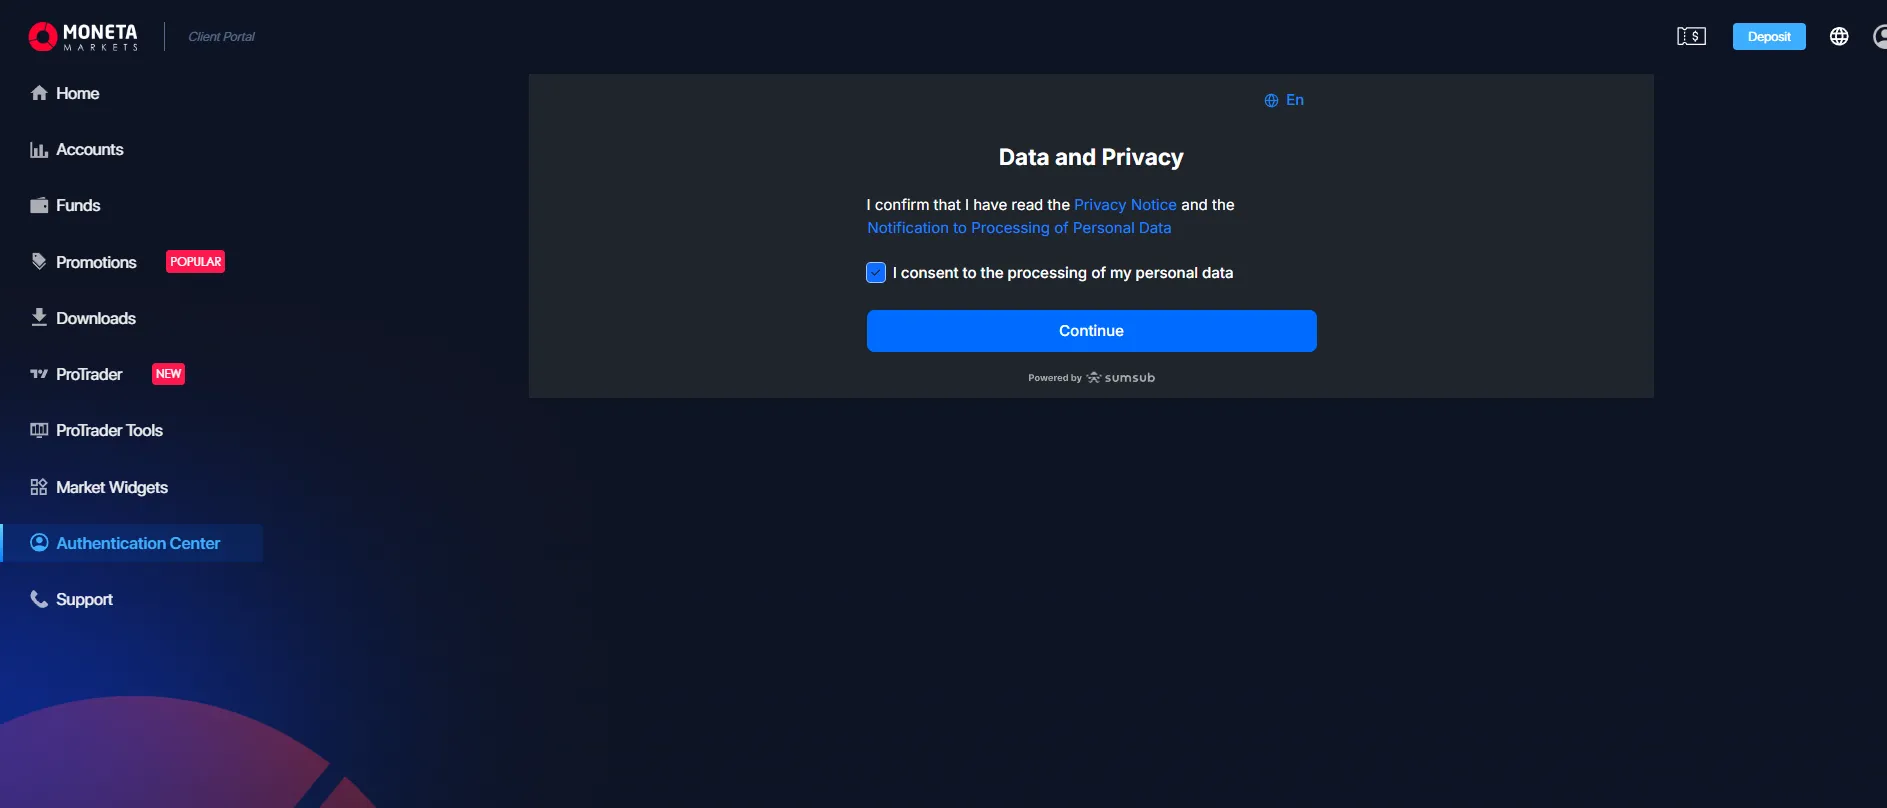
\n
On the page you see a short text that says:
\n\n«I confirm that I have read the privacy notice and how my personal data is processed».
\n\nRight below this text there is a blue checkbox that you also need to tick. Then click the blue Continue button.
\n\n2. The Select type and issuing country of your identity document page opens, where you need to choose the document type and the issuing country.
\n\n\n\n
\n\n
\n\n
\n
\n\nThe first thing to do is choose the document's issuing country. In the Issuing country menu, click the small arrow and find Iran.
\n\nNow it is time to choose the document type, and there are four different options in all:
\n\n- \n
- Driver's license \n
- ID card \n
- Residence permit \n
- Passport \n
After choosing the document type, click Continue. There is also a Continue on phone option, which lets you complete verification by recording and sending a short video.
\n\n\n\n
3. The Upload your document page opens, and the progress bar shows that you have almost reached the finish line.
\n\n
\n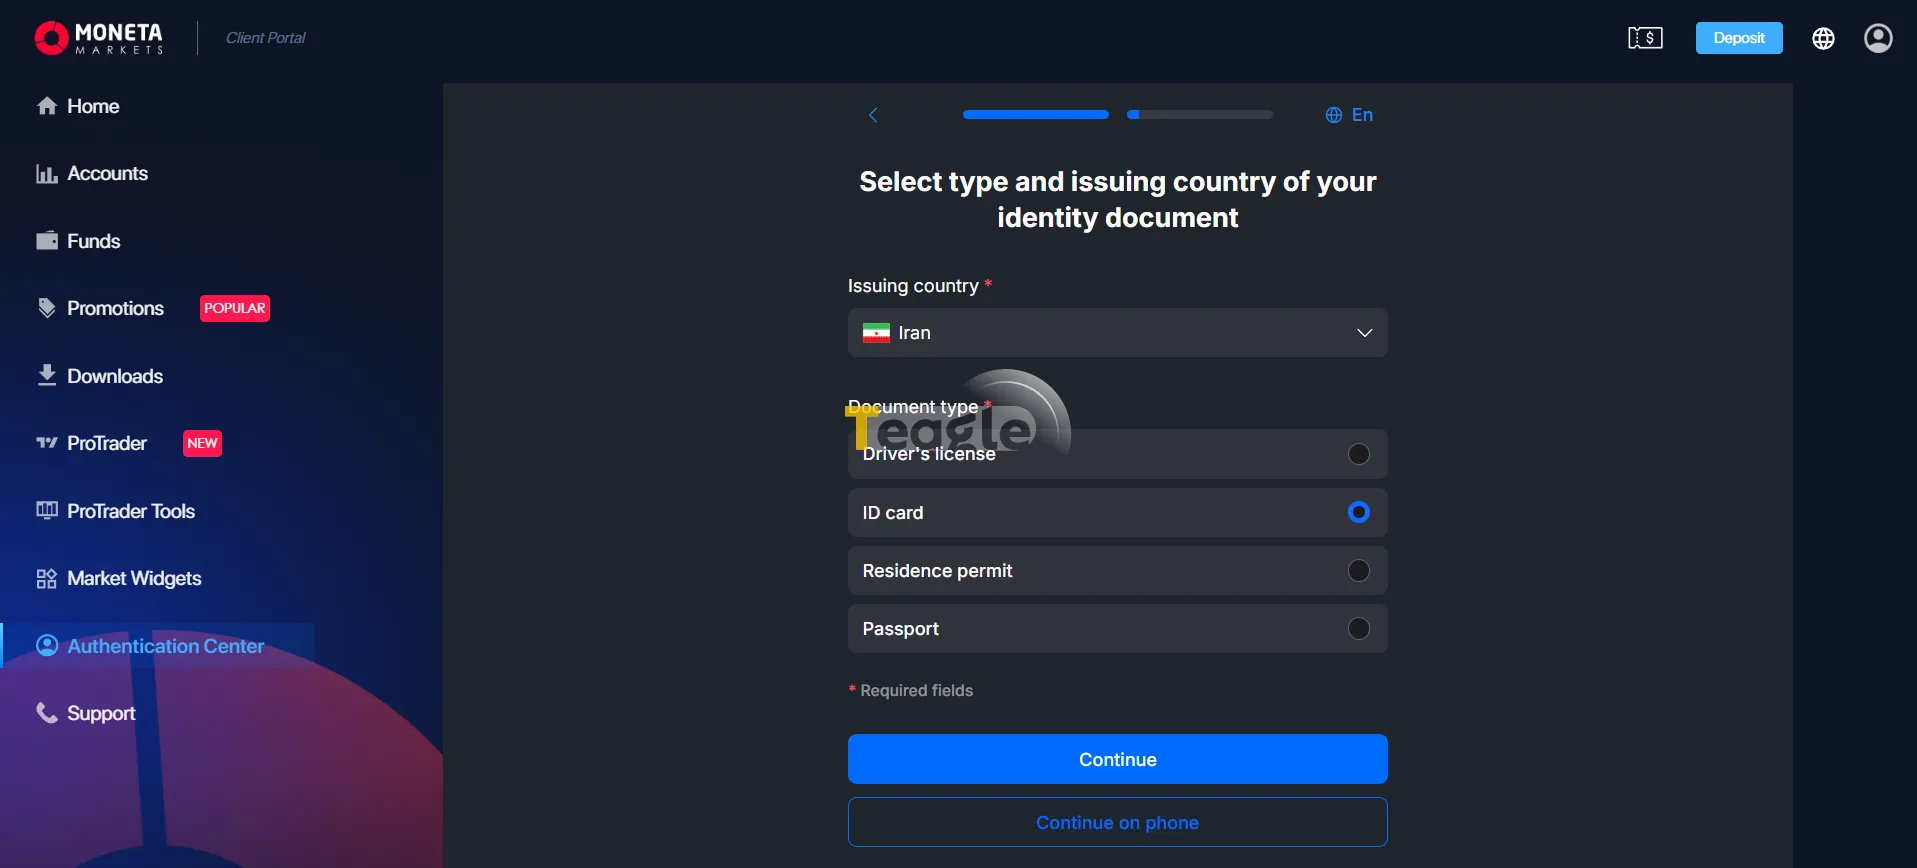
\n
At the top of the page is the document type you chose; we chose ID card. Now there are two important sections in front of you:
\n\n- \n
- Front side (front of the national ID card) \n
- Back side (back of the national ID card) \n
After uploading both photos, click Continue.
\n\n\n\n
4. You have reached the last step and are now on the Lv2. ID Verification page.
\n\n
\n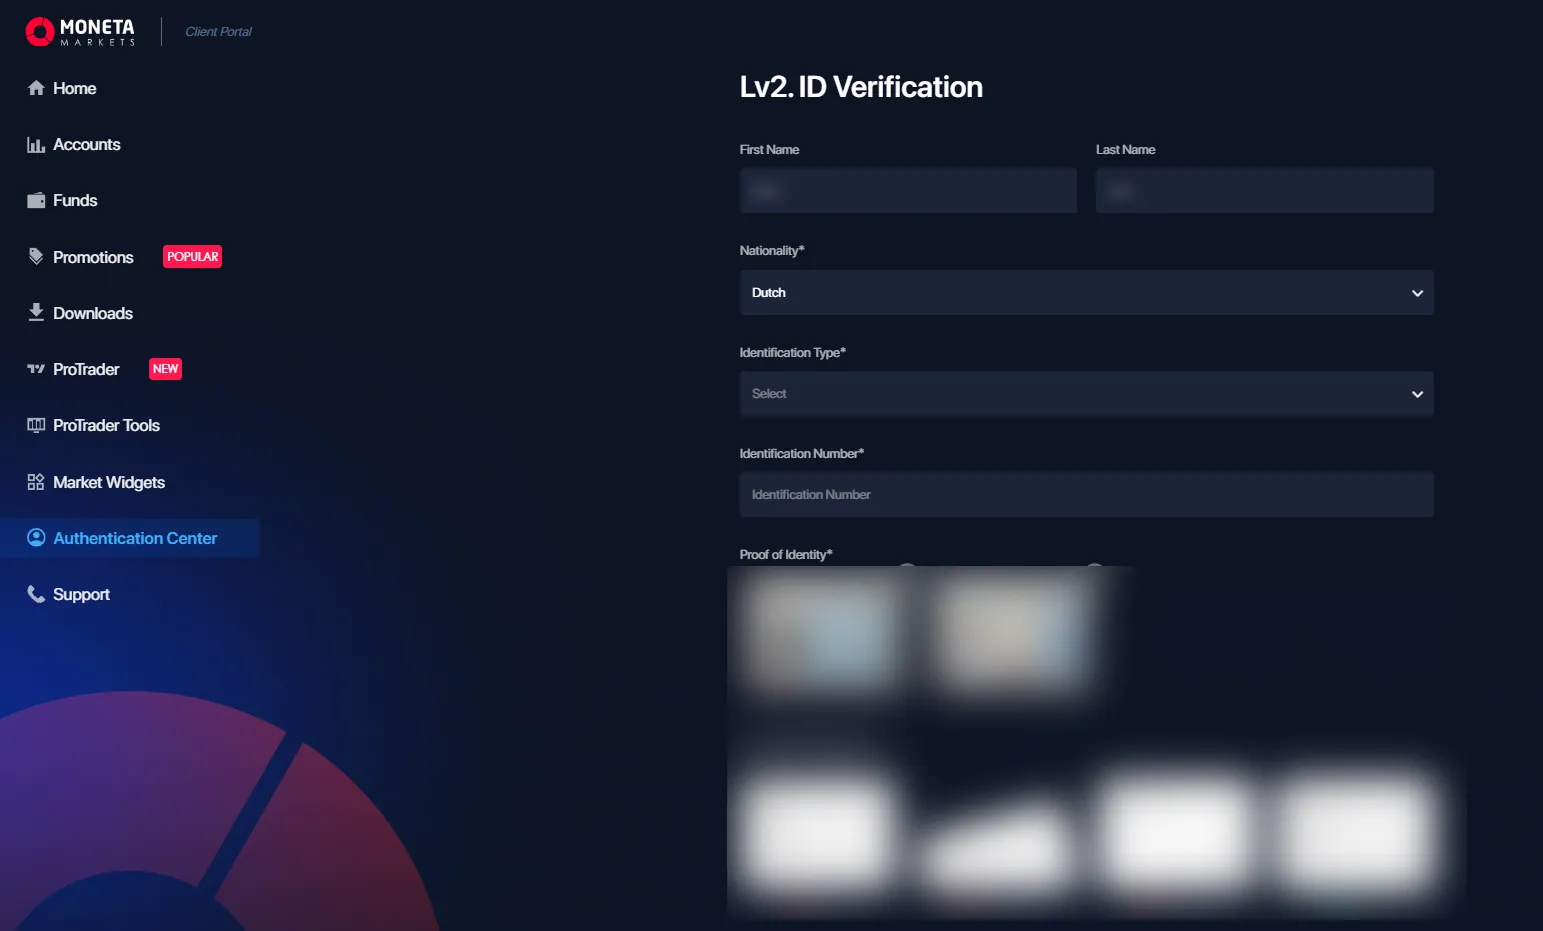
\n
Check the required fields and click the blue Submit button. You will see the Verifying your personal information page.
\n\n
\n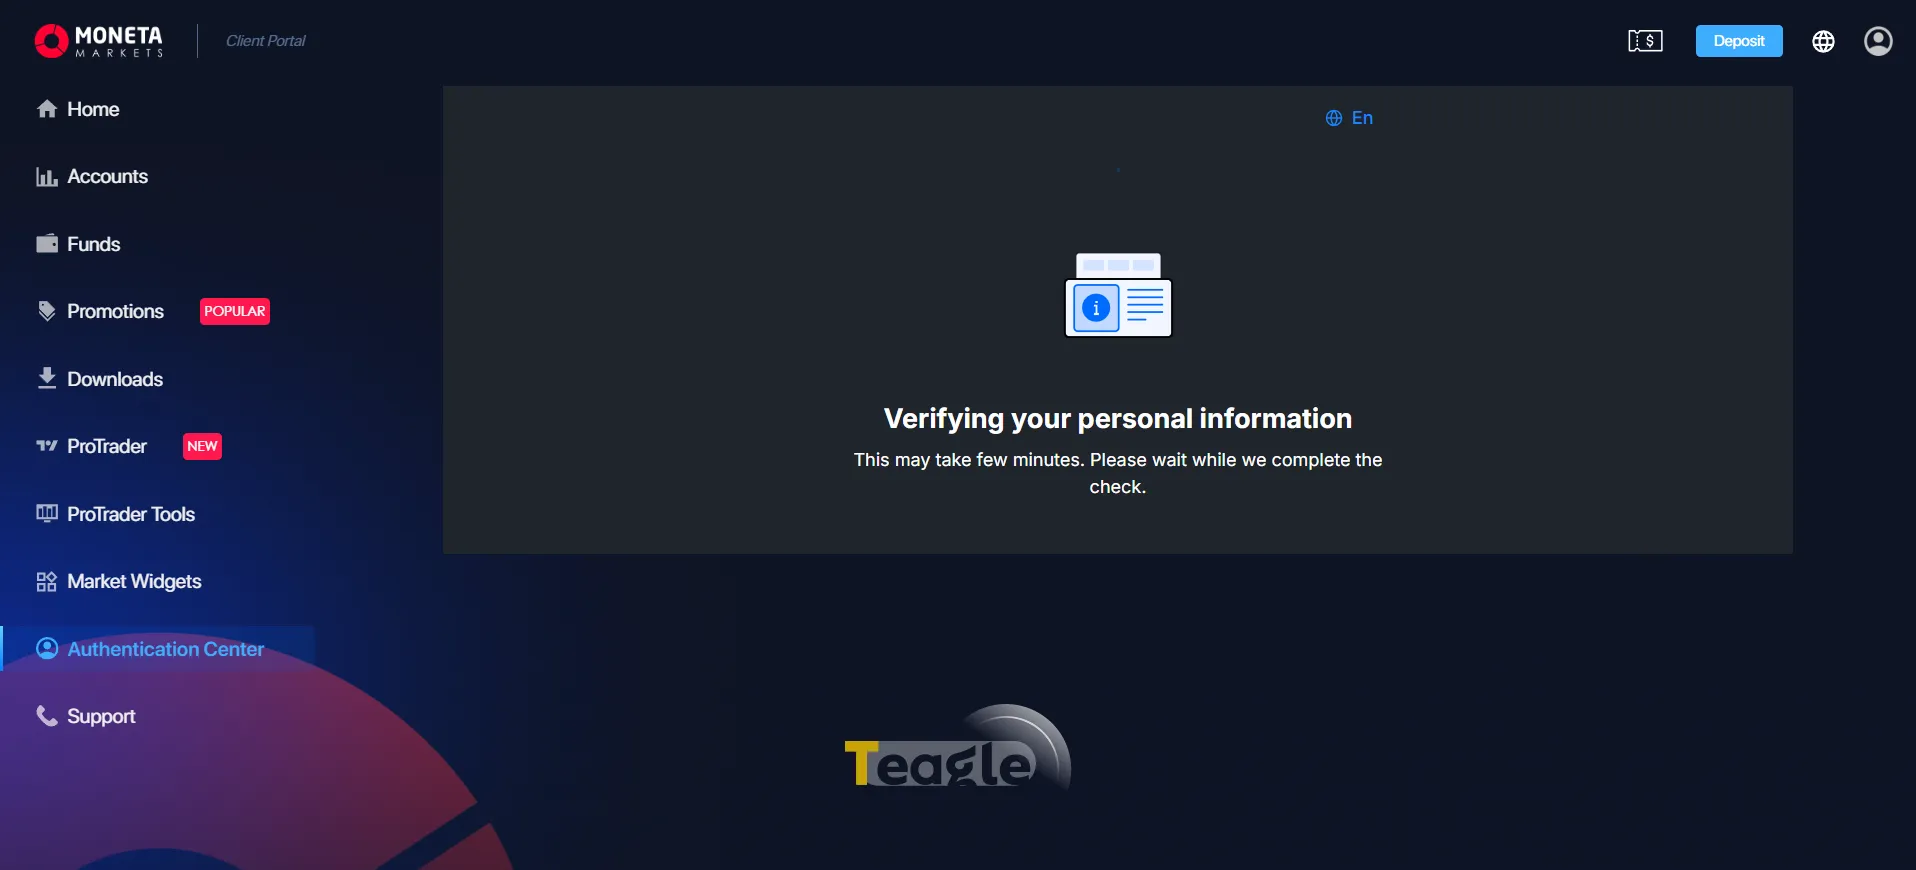
\n
Once the check is finished, one of two things happens:
\n\n- \n
- You are automatically taken to the confirmation page, which means your verification went through without problems. \n
- You receive a message telling you which part needs correcting. \n
Choosing an account type at Moneta Markets
After completing your personal information, you move on to choosing the account type:
\n\n1. You enter the Account Configuration section. This page is one of the most important steps, because you decide which type of account and which currency you want to work with.
\n\n
\n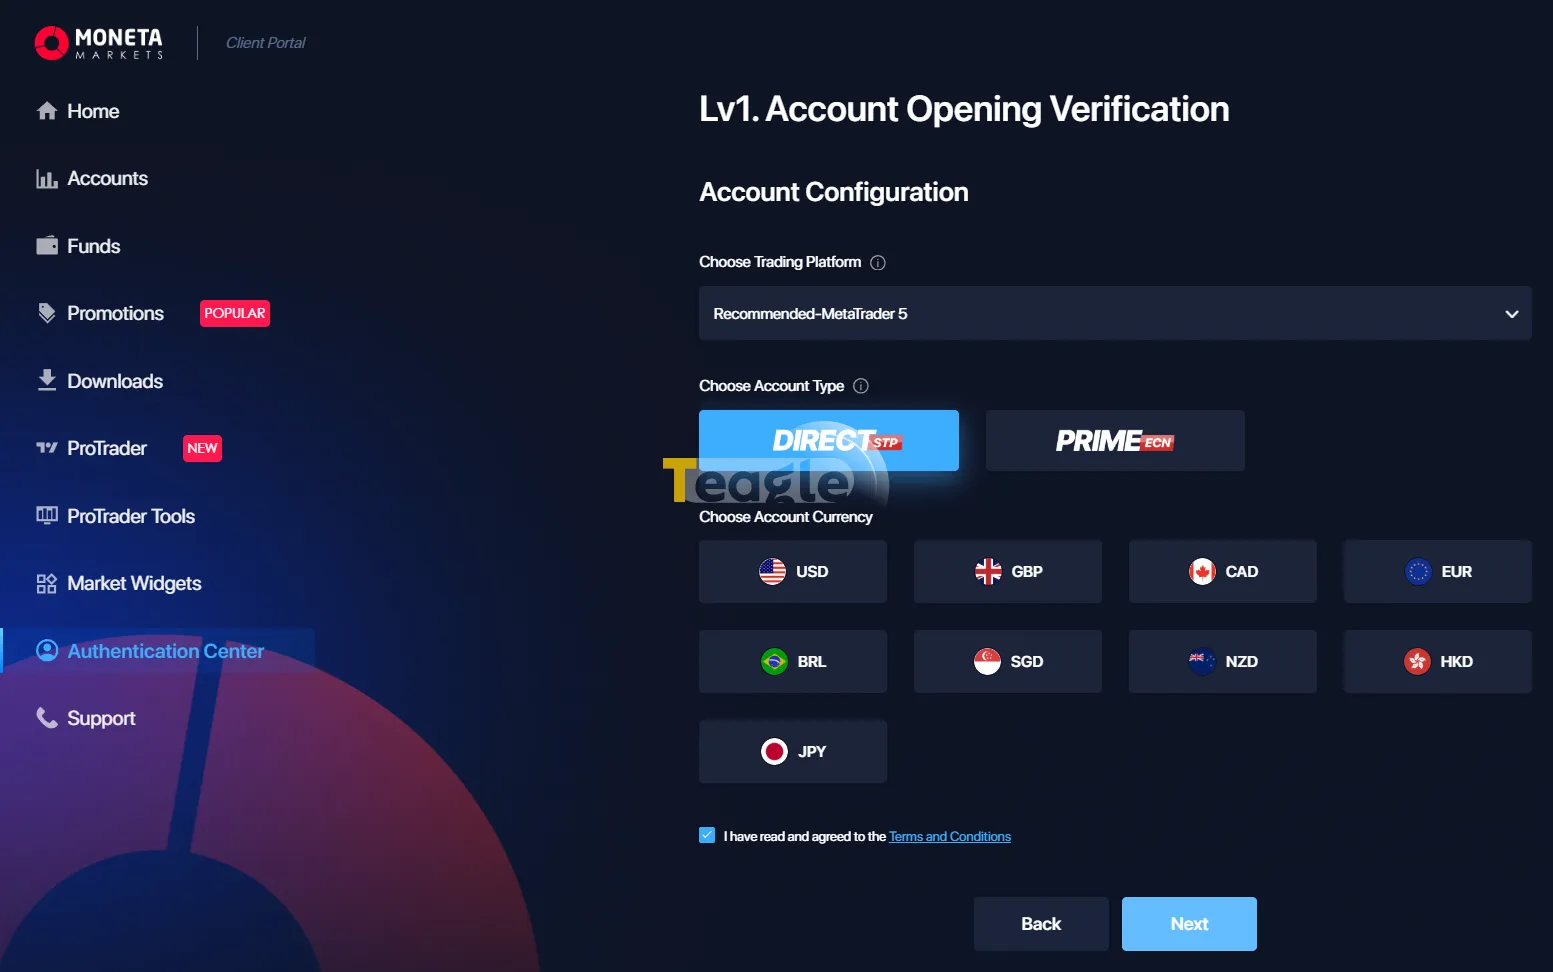
\n
The first option is Choose Trading Platform. The default is Recommended-MetaTrader 5, which is MetaTrader 5.
\n\nThe second section is Choose Account Type, which has 2 options:
\n\n- \n
- DIRECT STP which means a standard account with direct order execution. \n
- PRIME ECN which is a more professional account with lower spreads. \n
After choosing the account type, in the third section, Choose Account Currency, select the currency you want. At the bottom of the page, tick the I have read and agreed to the Terms and Conditions checkbox.
\n\n\n\n
2. After finishing the previous steps, you reach a page with the message Complete your Account Opening. This page shows that your initial registration was successful and you can now fund your account.
\n\n
\n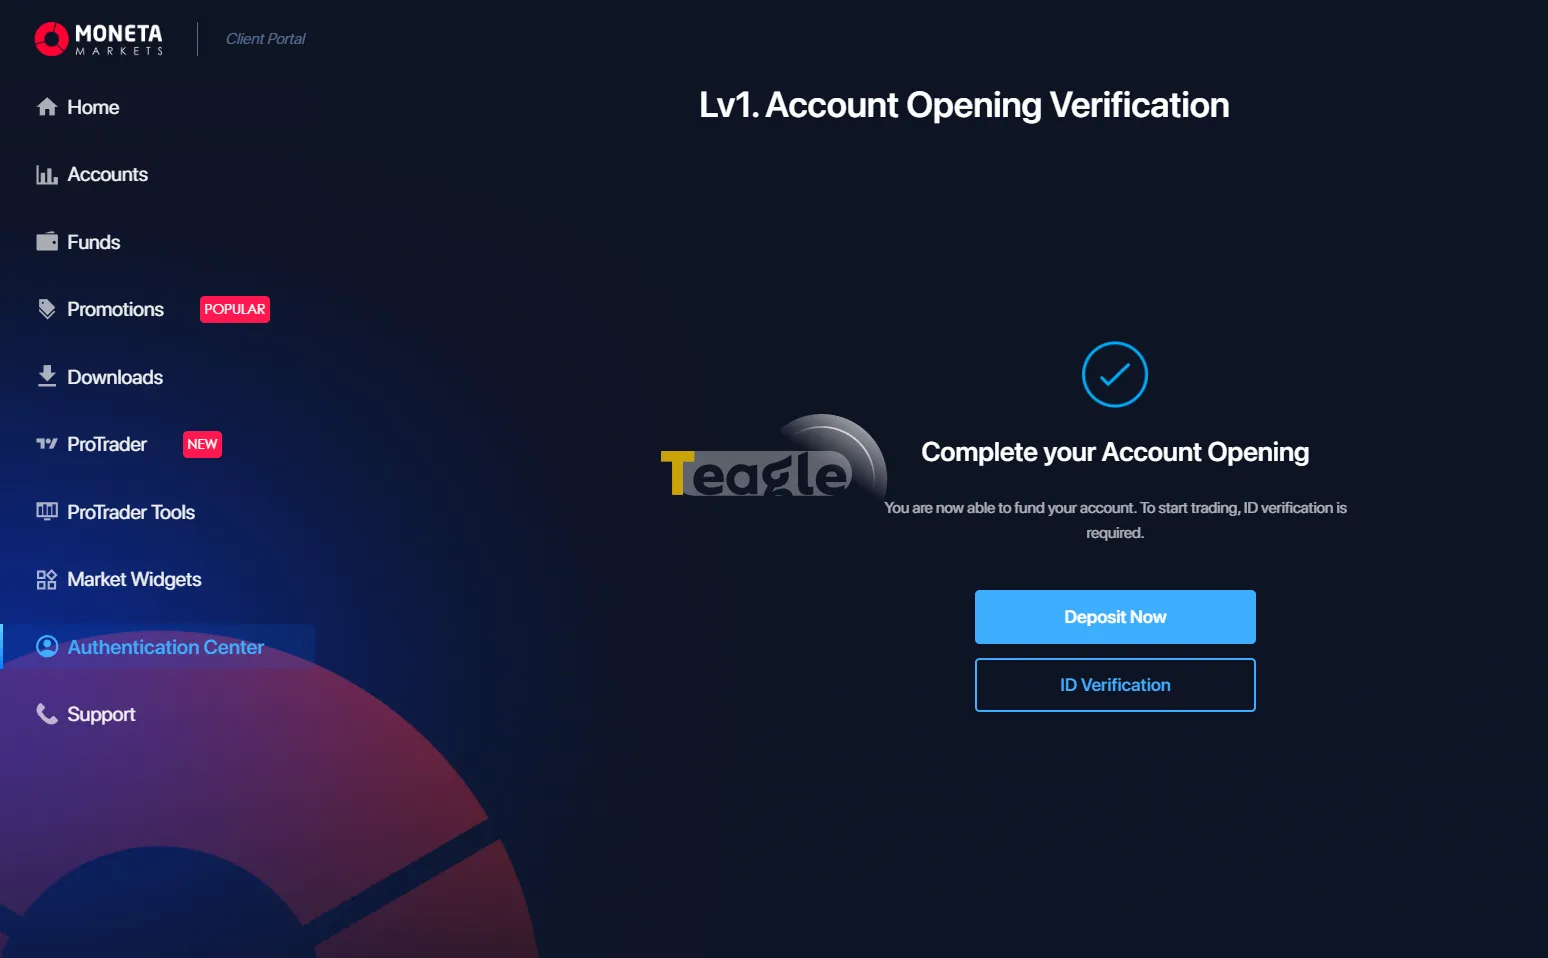
\n
At this stage you have two options and can click either:
\n\n- \n
- Deposit Now: you can go straight to the deposit section and fund your account for the first time. \n
- ID Verification (verification): clicking it takes you to the verification section to upload your identity documents. \n
Our recommendation is to complete verification first, so that after depositing you have no trading restrictions.
\n\n3. The Upload your document page opens, and the progress bar shows that you have almost reached the finish line.
\n\n
\nHow to open a demo account at Moneta Markets
\n\nTo open a demo account at Moneta Markets, follow these steps:
\n\n1. After signing up and logging in to the user panel, click Accounts in the left-hand menu. A new page opens with a drop-down menu titled Demo Account at the top. Then click the blue Open Account button.
\n\n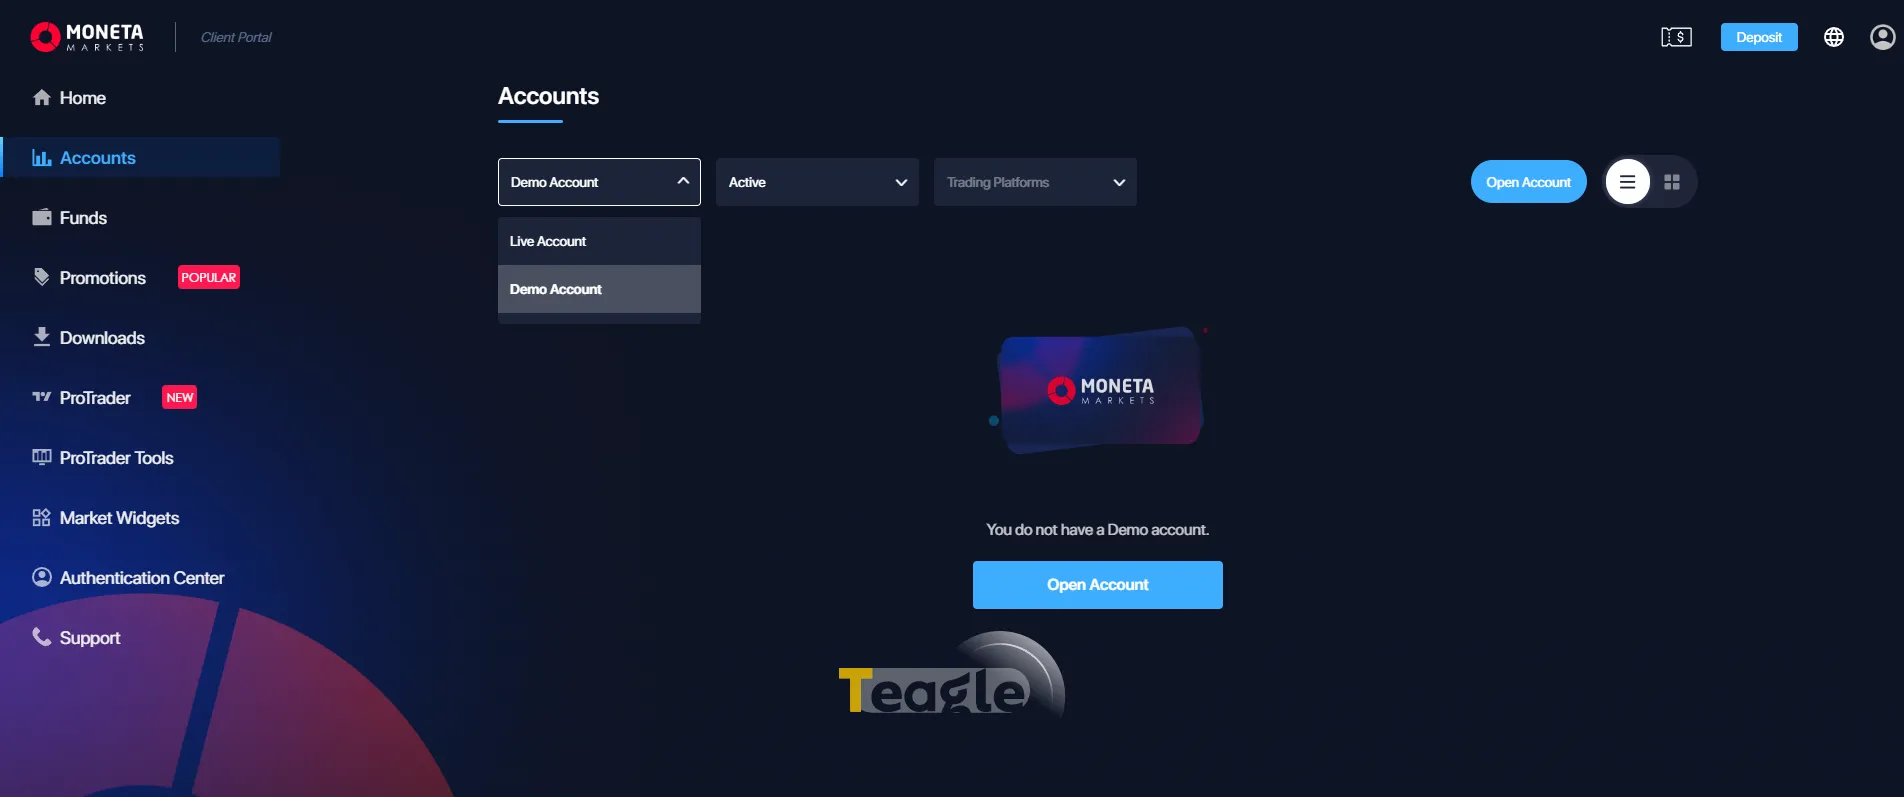
\n
2. After clicking, the demo account settings page opens, where you need to choose the account type, the currency pair and your leverage.
\n\n
\n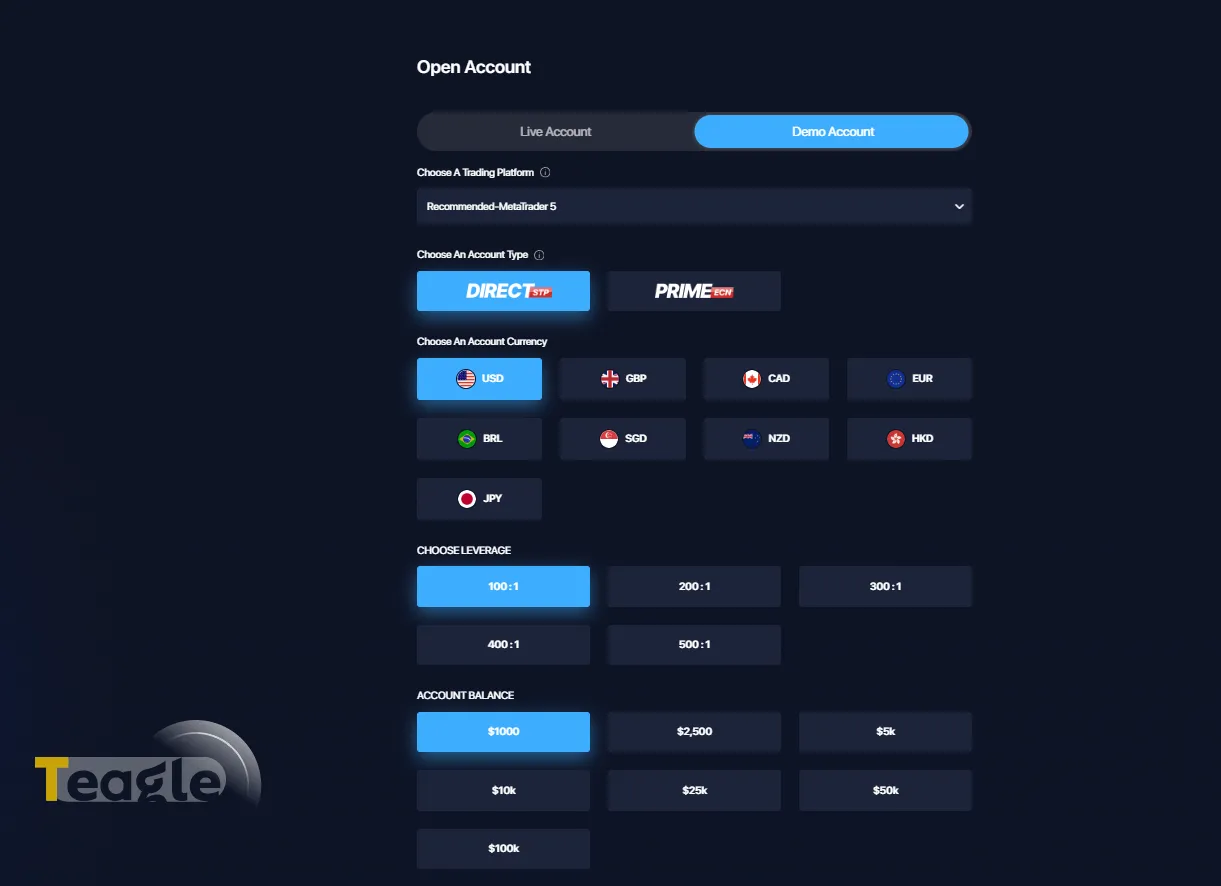
\n
After setting all the options, click Submit and wait a few seconds. You will then see the confirmation page with a big blue tick.
\n\n
\n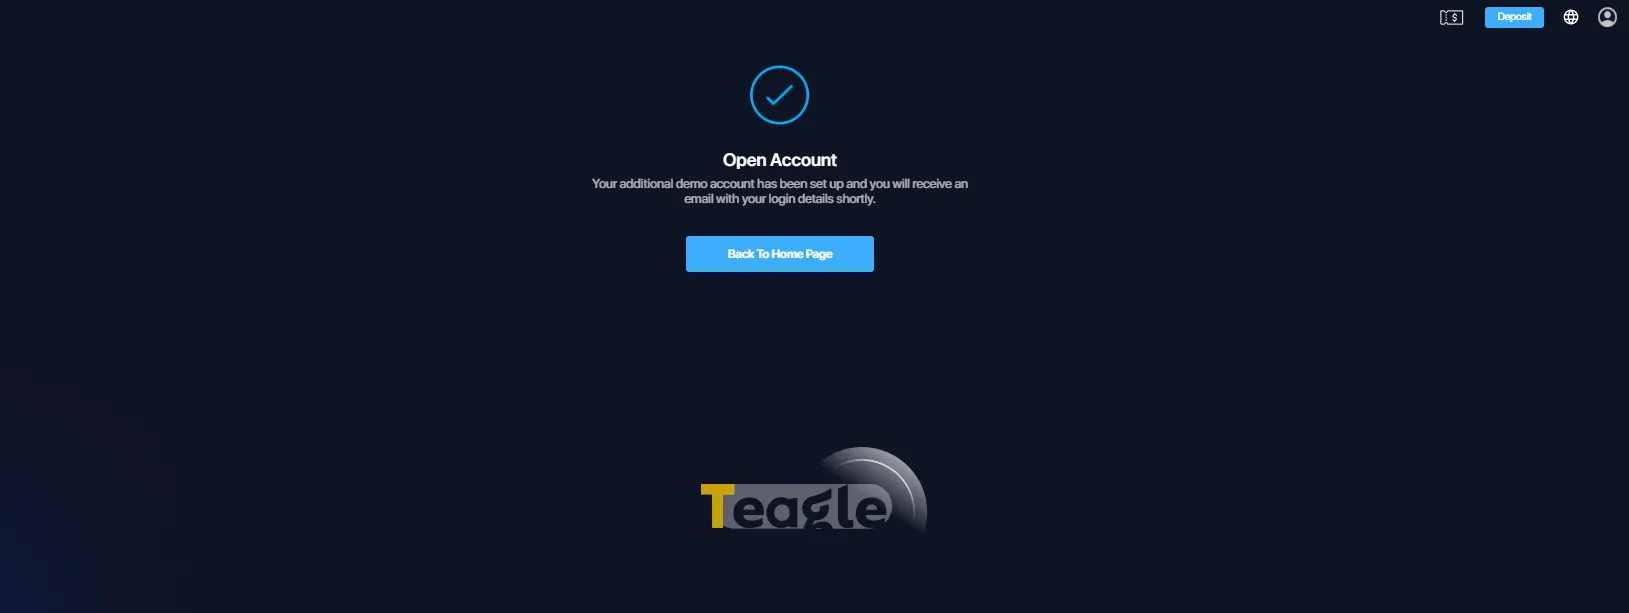
How to deposit into a Moneta Markets account
Follow these steps:
\n\n1. Go to the Funds section and choose your account. Open the main page and click Funds.
\n\n
\n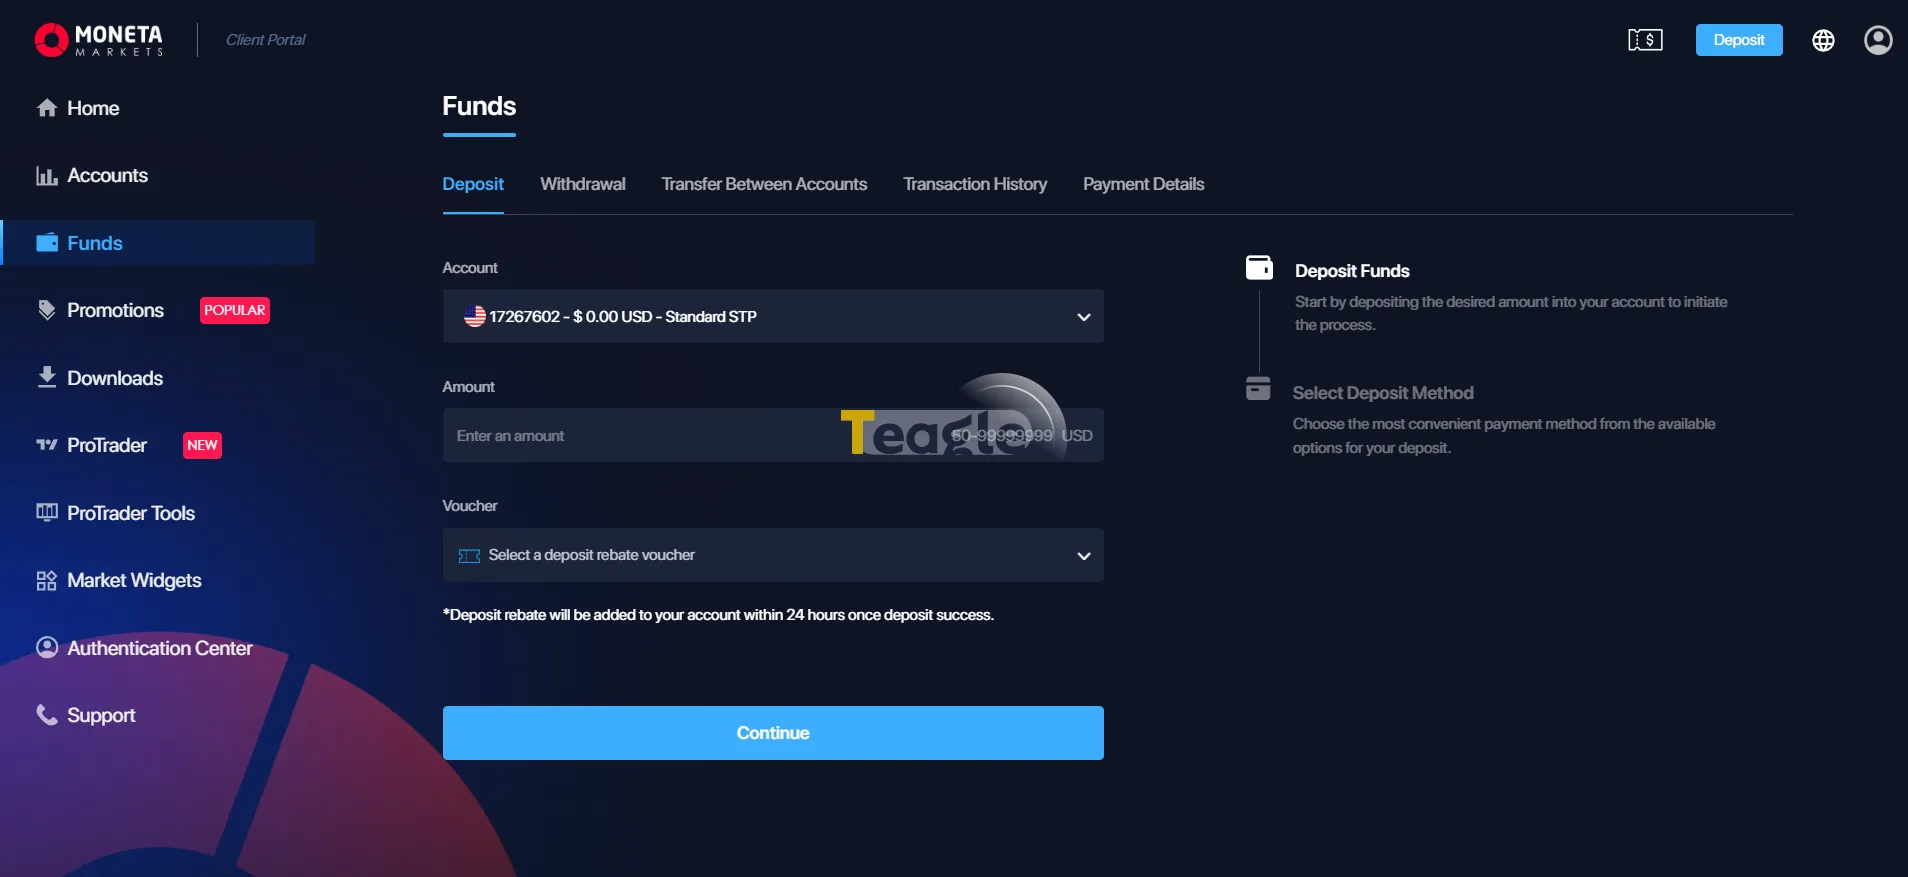
\n
The Deposit tab is marked with a blue line under it and is what you need now. The other tabs are Withdrawal, for when you want your profits; Transfer Between Accounts, for moving money between your accounts; Transaction History; and Payment Details, for payment information.
\n\nNow you need to fill in three main items:
\n\n- \n
- Account (account): which account do you want to fund? For example 17267602 - $0.00 USD - Standard STP \n
- Amount (amount): how much do you want to deposit? You can usually choose from $50 to $99,999,999. \n
- Voucher (voucher): if you have a discount code, enter it here. \n
Finally, click the Continue button.
\n\n\n\n
2. A page opens where you need to choose a suitable deposit method.
\n\n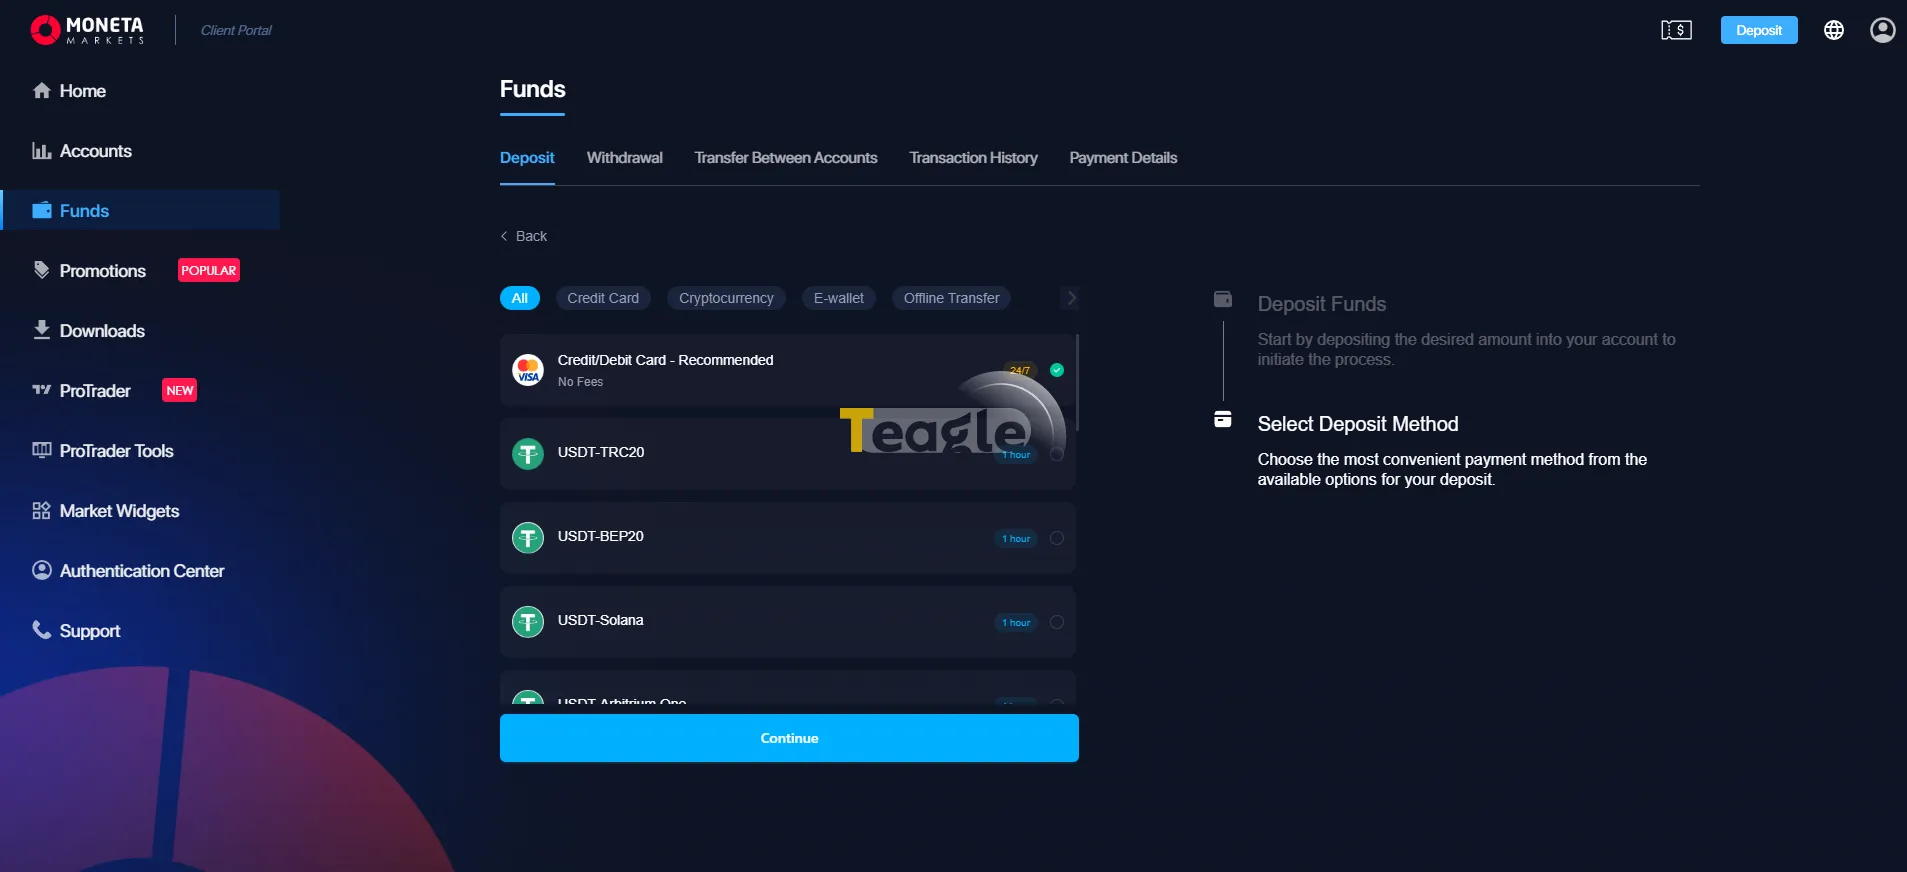
\n
The methods are grouped and include:
\n\n- \n
- All \n
- Credit Card \n
- Cryptocurrency \n
- E-wallet \n
- Offline Transfer \n
\n\n
Back when Moneta Markets served Iranians, Iranian users could only choose cryptocurrency, i.e. Tether (USDT-TRC20). That is why we explain this deposit method below.
\n\n\n\n
3. After choosing to deposit with the USDT cryptocurrency, click the Continue button.
\n\n\n\n
4. A new page titled USDT-TRC20 opens. Before depositing, keep the broker's deposit notes in mind:
\n\n- \n
- The deposit amount must be more than 5 Tether. \n
- USDT-TRC20 transactions fall into 2 categories: internal and external \n
- Make sure you have copied the address and network correctly.
\n
\n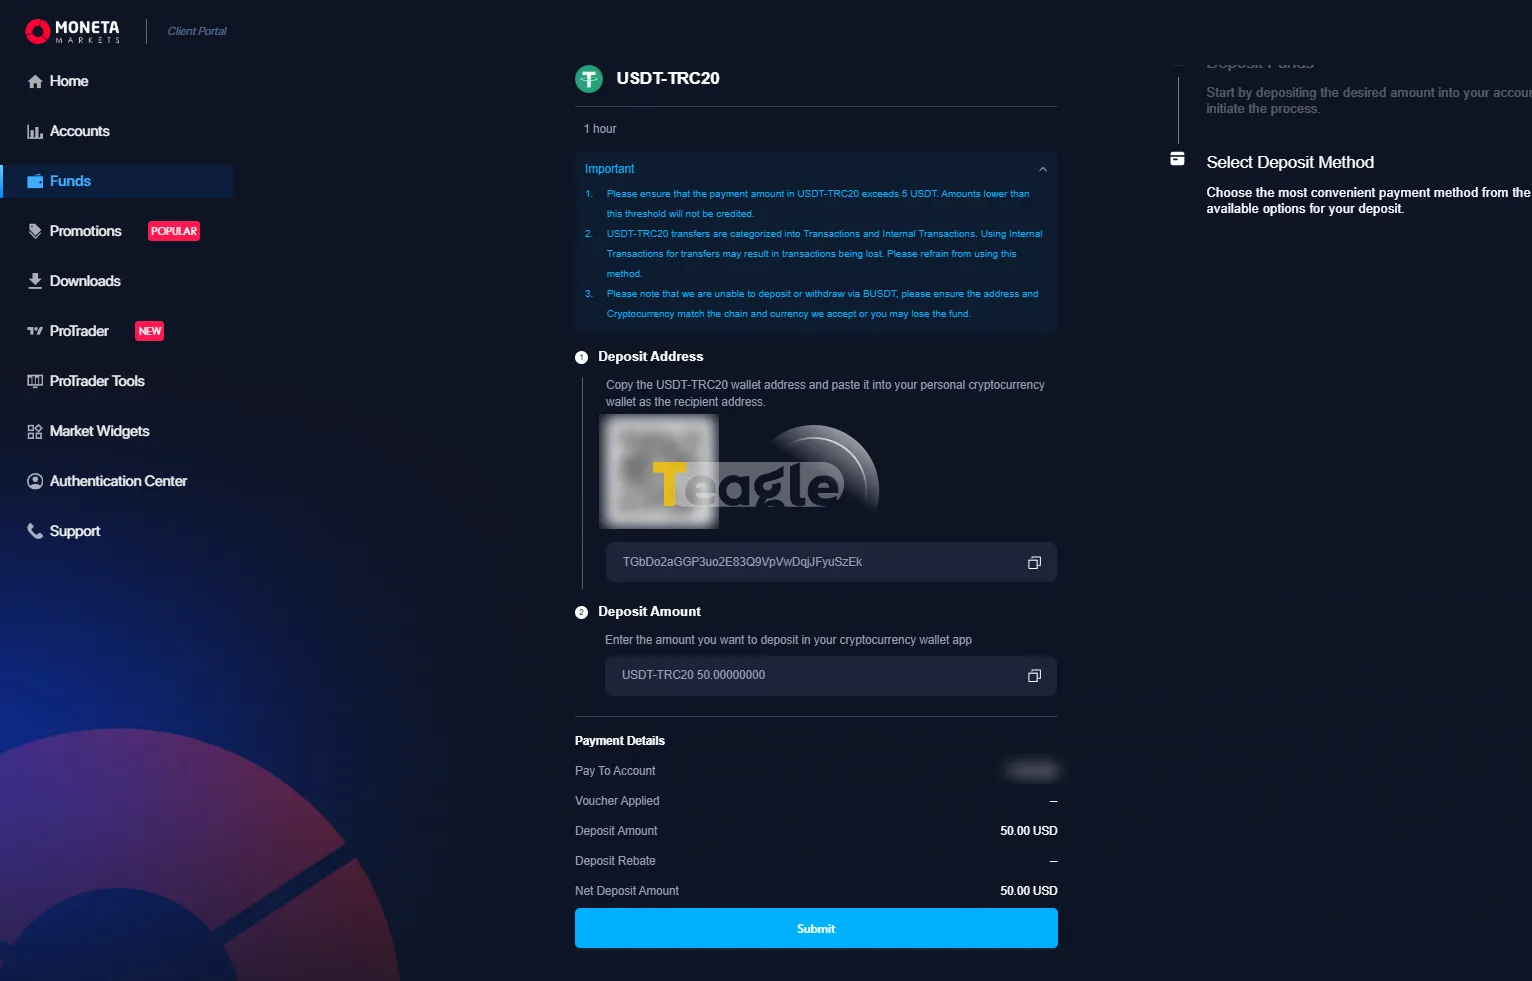
\n
\n Further down is the Deposit Address section with a QR code that you can scan with your phone's camera. Next comes the Deposit Amount section. Enter the amount you want from the source wallet. At the end, the Payment Details section shows a summary of everything. If everything is correct, click Submit. \n
Connecting the broker to trading platforms
Moneta Markets offers its services on the 2 popular platforms MetaTrader 4 and 5. To connect Moneta Markets to these platforms, you first need to open a live or demo account with the broker. After that, see how to connect to MetaTrader 4 and MetaTrader 5 through this link.
How Iranian users deposit and withdraw at Moneta Markets
How to deposit into a Moneta Markets account was explained earlier. To withdraw from a Moneta Markets account, follow these steps:
\n\n\n\n
1. Log in to the user panel and go from the Fund section to the Withdrawal section. Here you need to enter your account and the amount you want to withdraw.
\n\n
\n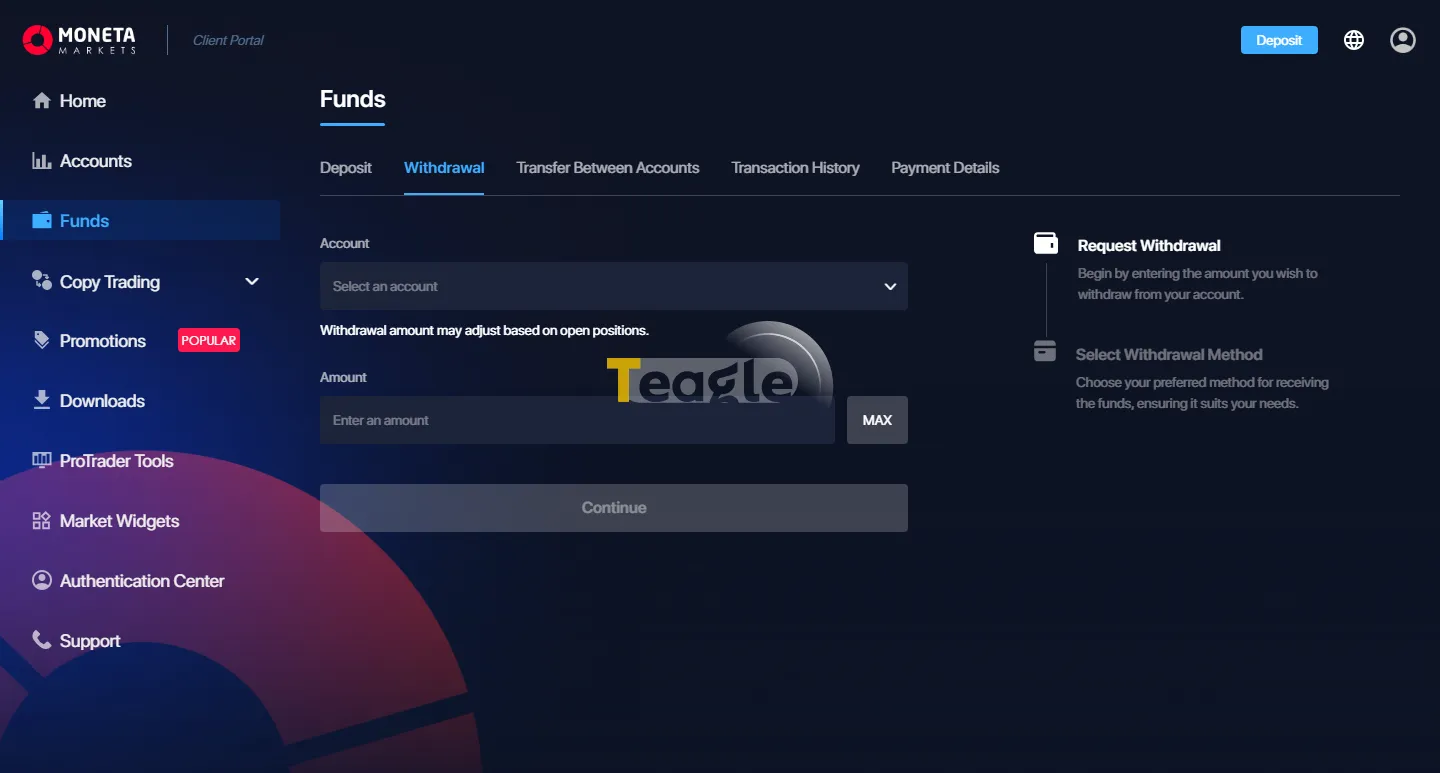
\n
2. In the next step, choose the withdrawal method you want.
\n\n3. Finally, depending on the chosen method, processing your withdrawal takes 1 to 3 working days.
Key points for Iranians working with Moneta Markets
At the time of writing, Moneta Markets no longer serves Iranians. The broker stopped serving Iranians on 30 April 2026. So users should consider other brokers for trading.
Articles related to the broker
User reviews

Newest
